GST Invoice Management System (IMS) in BUSY
The Invoice Management System (IMS) under GST helps businesses review invoices reported by their suppliers and take the appropriate action before finalising Input Tax Credit (ITC). Instead of separately checking IMS data on the GST portal and comparing it with accounting records, BUSY allows you to handle everything within the software.
Spot Mismatches. Simplify ITC Review.
Compare supplier invoices with your books and manage IMS actions directly from BUSY.
Trusted by Businesses, Rated by Experts


How BUSY Helps You Reconcile IMS Faster
One-Click IMS Data Download
Smart Invoice Matching & Mismatch Detection
Easy Accept, Reject & Pending Actions
Direct GST Portal Upload & GSTR-2B Recompute
How to Use Invoice Management System (IMS) in BUSY
Step 1: Enter GST portal credentials
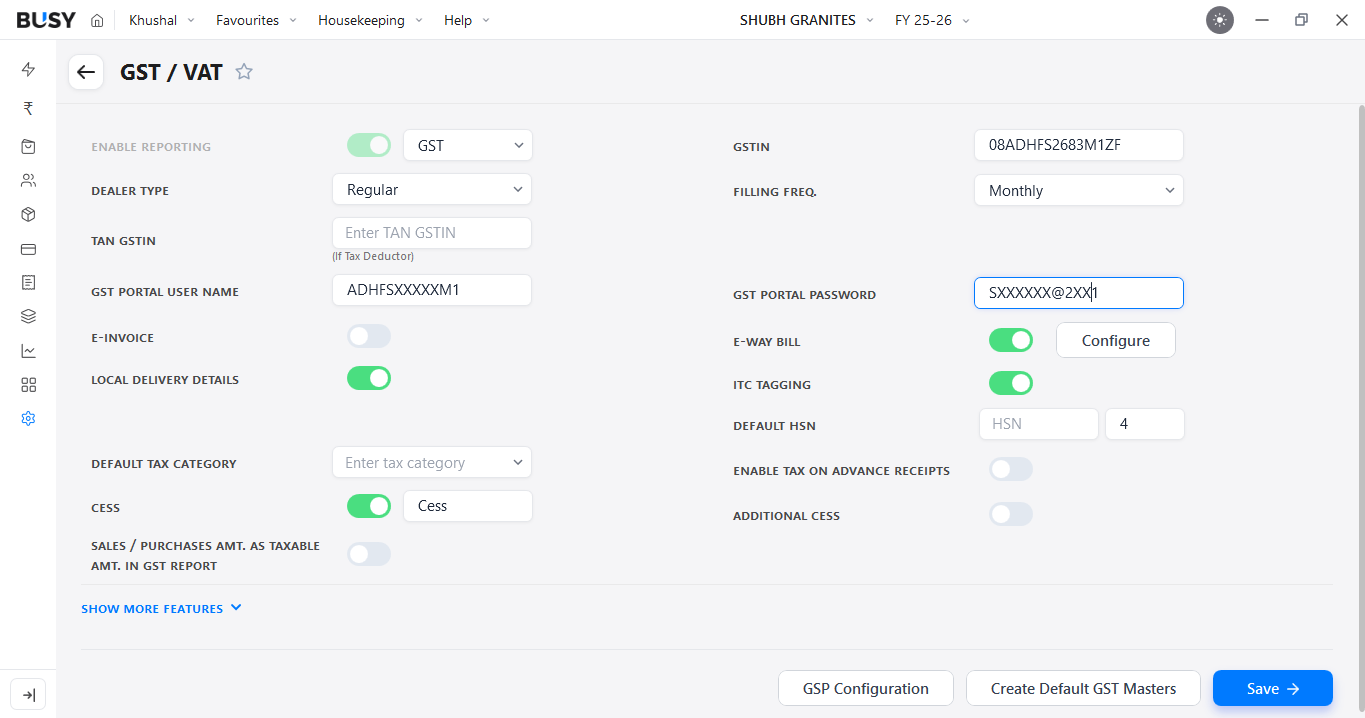
Go to Settings > Feature/Option > GST/VAT, then enter the GST portal username and password.
Step 2: Download IMS data
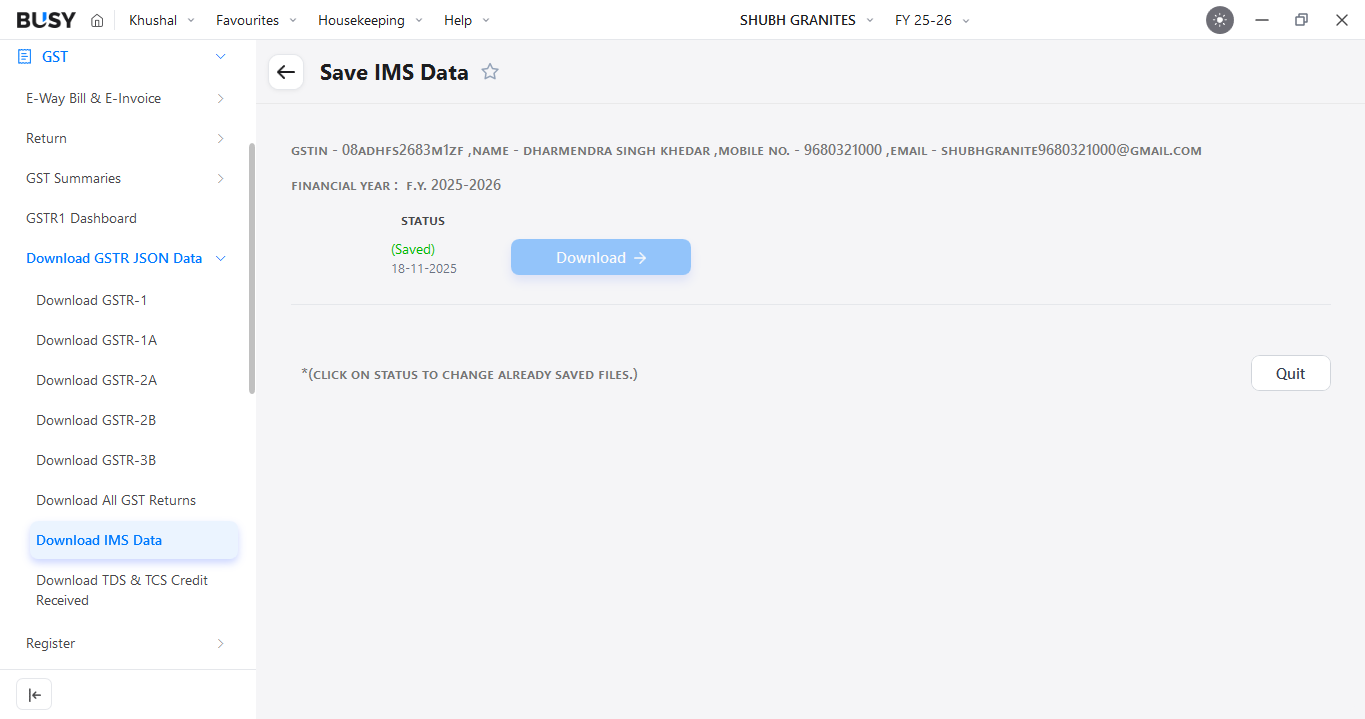
Go to GST > Download GSTR JSON Data > Download IMS Data and click Download.
Step 3: Enter the OTP
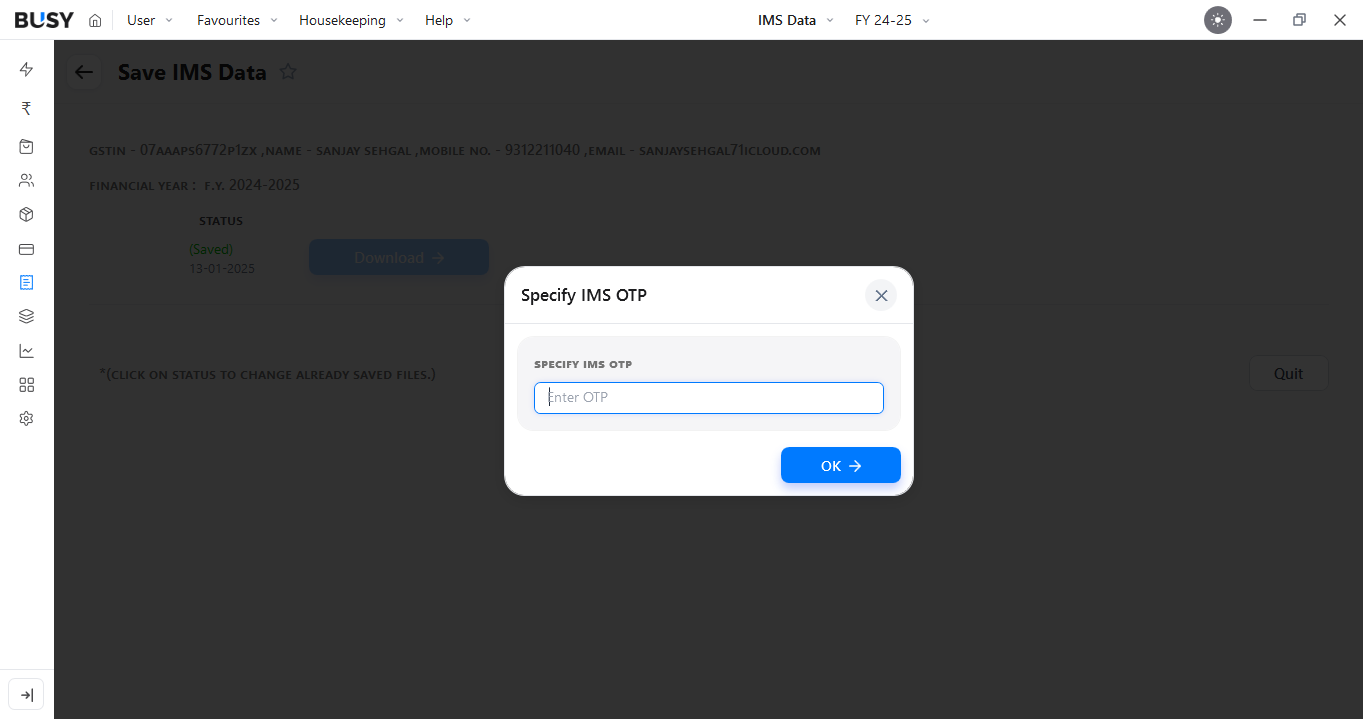
An OTP will be sent for authentication. Enter the OTP to download the IMS data for the current month.
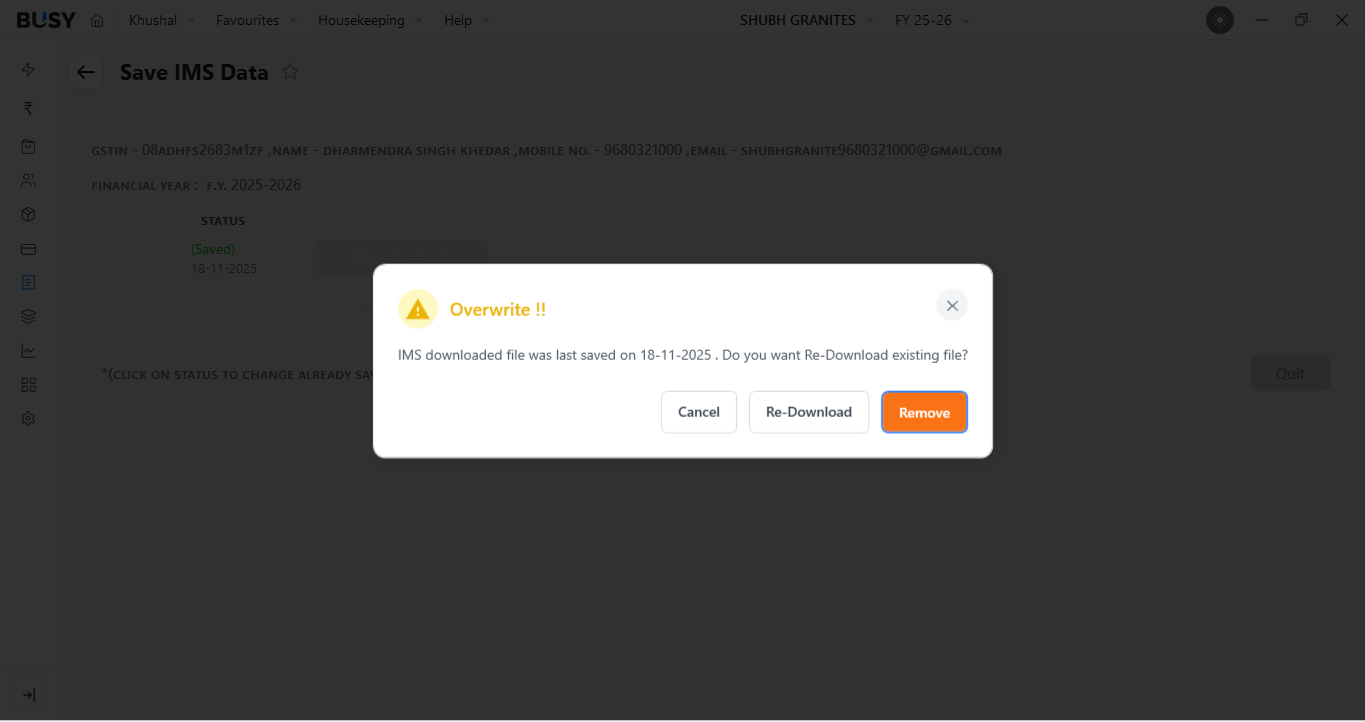
You can Re-Download the IMS data whenever required or remove the previously downloaded data before downloading it again. Repeat this process every month to download the latest IMS data.
Step 4: Open the IMS report
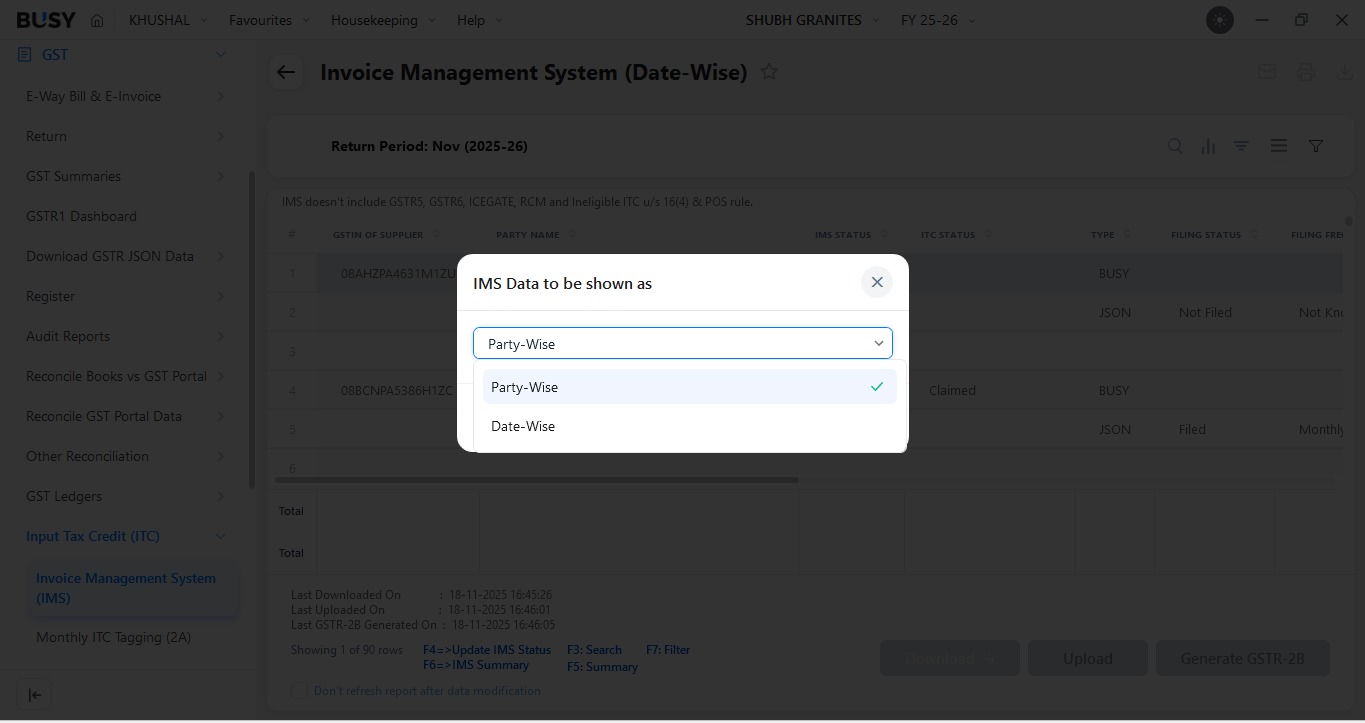
Go to GST > Input Tax Credit > Invoice Management System (IMS). Then choose whether you want to view the data as Party-wise or Date-wise
The IMS screen displays invoice details available in the GST portal data and BUSY books. It will also show the action taken against the invoice. Review the invoices and identify any discrepancies between the IMS data and your books.
Step 5: Take action on invoices
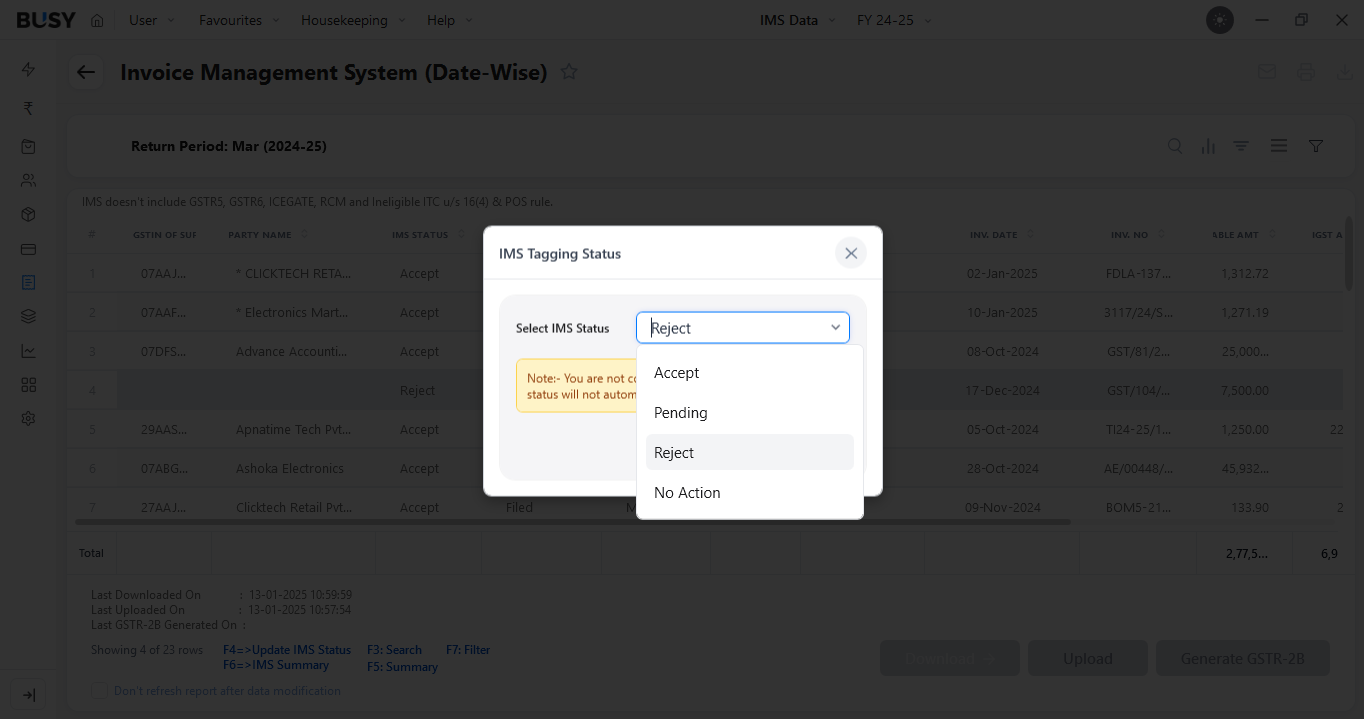
For each invoice, decide the appropriate IMS action. You can choose to Accept the invoice, keep it Pending, Reject the invoice, or take No Action.
Actions need to be selected manually for the relevant invoices. You can use the F4 key to perform these actions quickly.
Step 6: Apply advanced filters
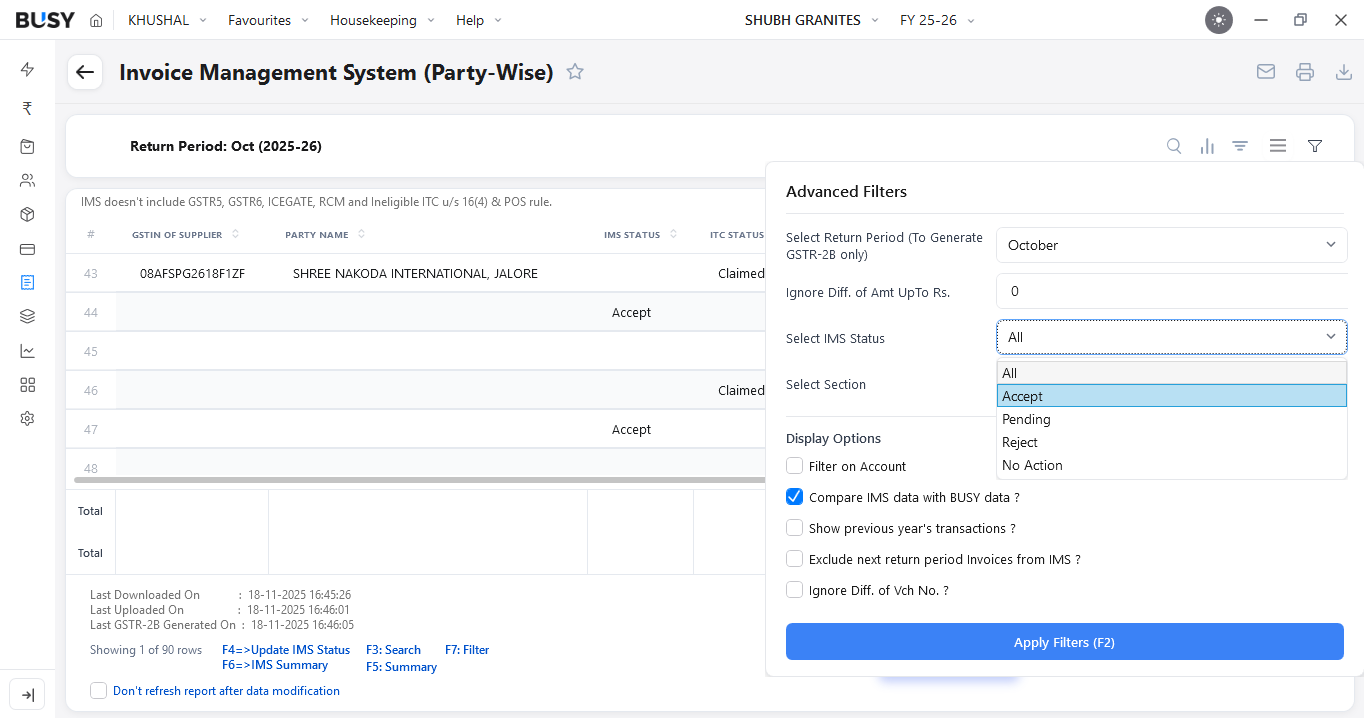
Use Advanced Filters to narrow down the IMS data based on your requirements.
You can filter or configure the report based on options such as Period, IMS status, Section type, Specific amount differences, or Ignore or round-off limits for minor differences.
It is suggested to enable Compare IMS Data with BUSY Data. You can also select another available display type depending on what you want to review.
Step 7: Download or Upload IMS Actions
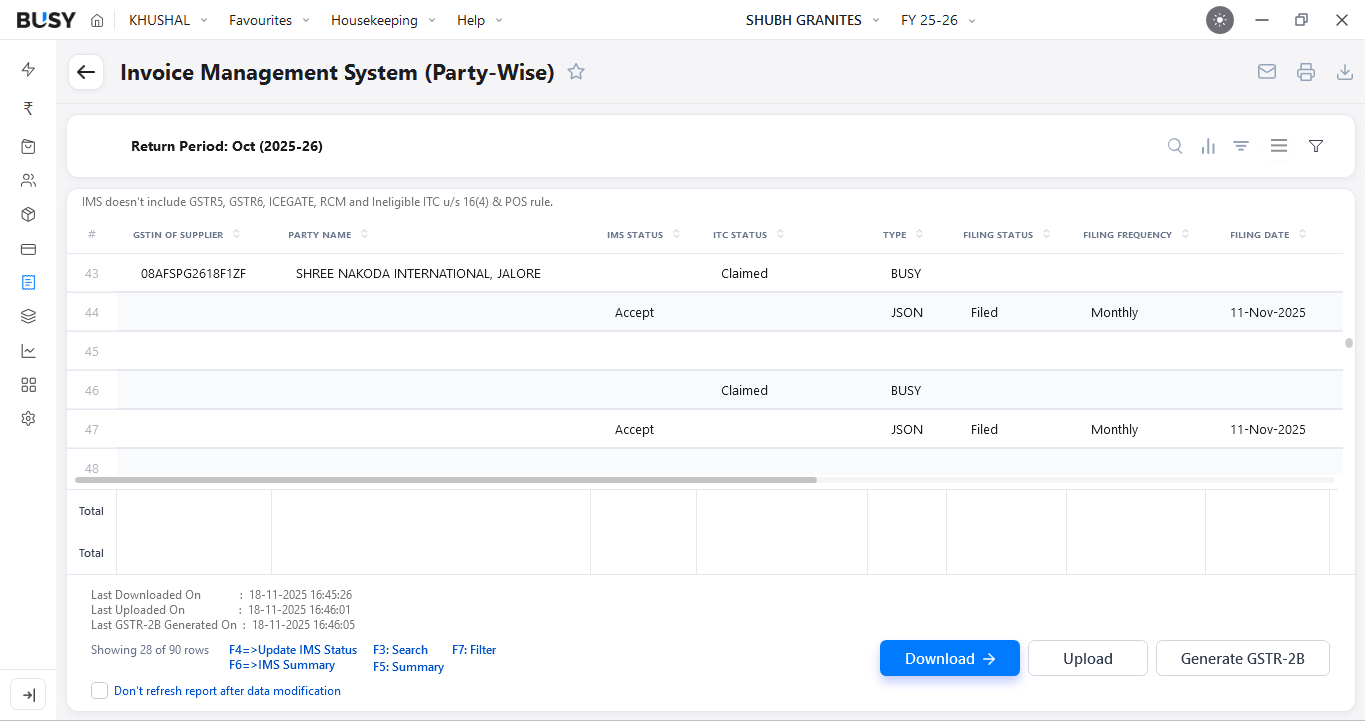
After reviewing the invoices and taking the required actions, you can perform the following actions from the IMS window:
- Click Upload to upload the selected IMS actions from BUSY to the GST portal. The actions selected in BUSY will be updated on the GST portal after uploading.
- If you need to download the IMS data again, click Download to go back to the IMS download screen and download the required data.
Step 8: Generate GSTR-2B
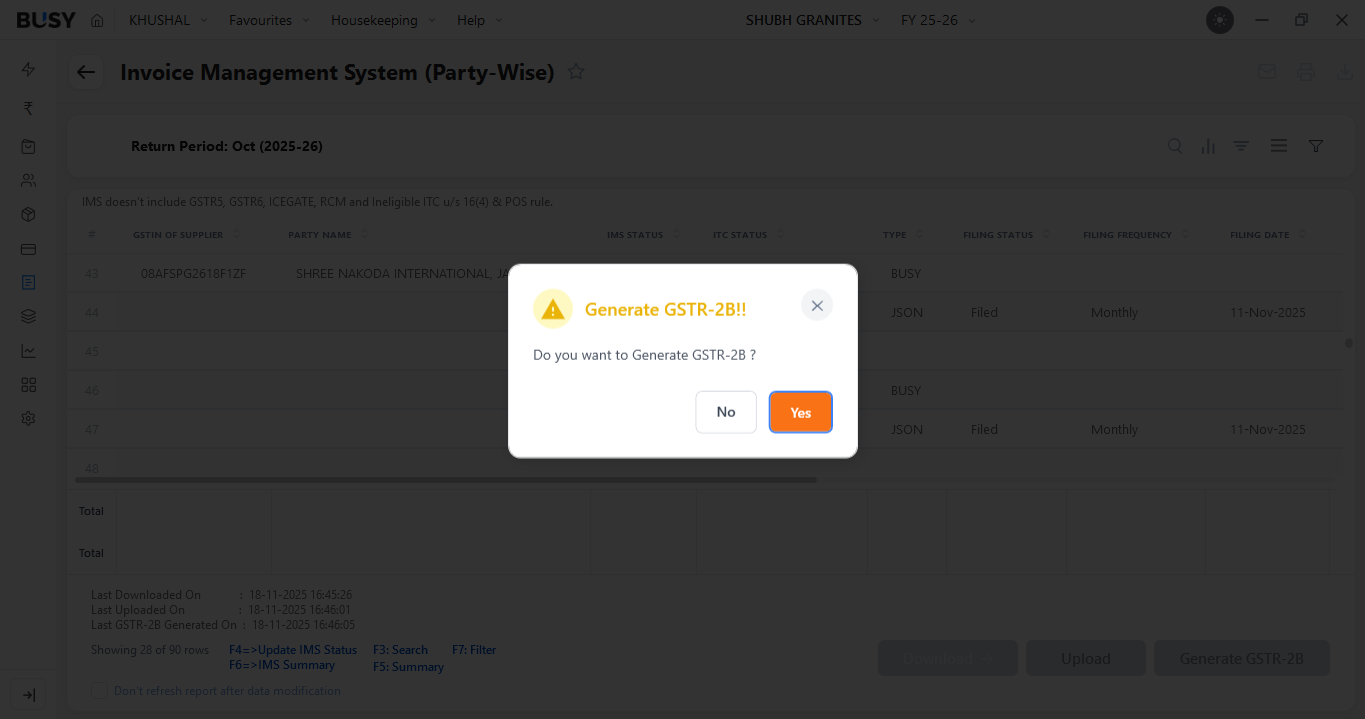
After uploading the IMS actions, select Generate GSTR-2B to update the report on the GST portal. Click Yes to proceed when the pop up appears.
Step 9: Enter OTP for GTSR-2B
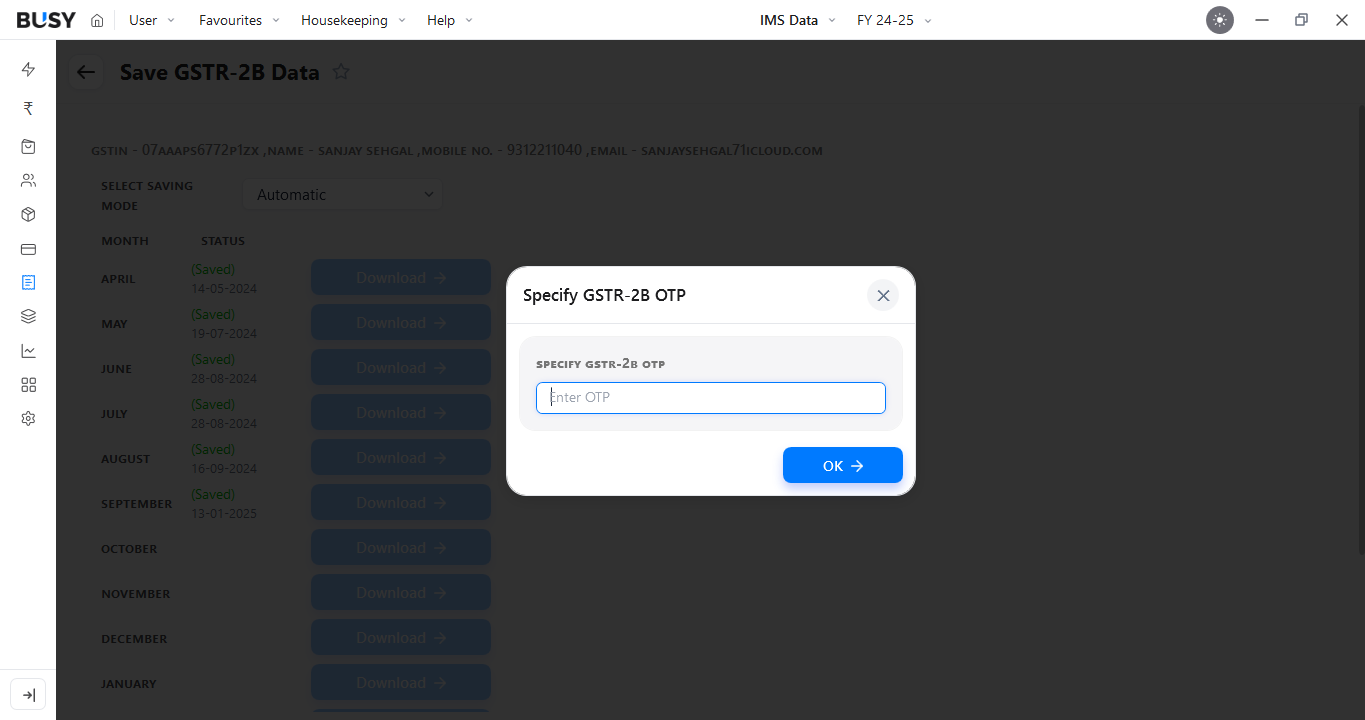
OTP authentication will be required again. Enter the OTP to complete the process.
The updated GSTR-2B will be generated.
What Our Customers Say
Real experiences from businesses across India.
Flexible Plans for Every Business
Paid plans start at just ₹5,000/year. Whatever your size, from small business to scaling enterprise, there's a BUSY plan built for you, so pick what you need today and upgrade anytime.
Enjoy More Accounting Benefits With BUSY
Free Mobile App for access on the go
Complete control over the User Activity Log
Auto-Backup through Google Drive