POS Billing Software for Retail Businesses
POS Billing is a billing system designed for businesses that handle regular counter sales, such as retail shops, supermarkets, and showrooms. It helps businesses create bills quickly, manage customer transactions, process payments, and maintain accurate sales records, making day-to-day billing smoother even during busy hours.
Bill Faster. Keep Queues Moving.
Scan items, record payments and update stock with every bill.
Trusted by Businesses, Rated by Experts


How BUSY Makes Billing Faster & More Efficient
Create Bills with Quick Item Search or Scanning
Apply Discounts & Process Cash, Card or UPI Payments
Keep Sales, Stock & Accounts Automatically Updated
Simplify Daily Billing with Less Manual Work
How to Use POS Billing in BUSY
Set Up POS Billing
Step 1: Configure the Voucher Series for Faster Billing
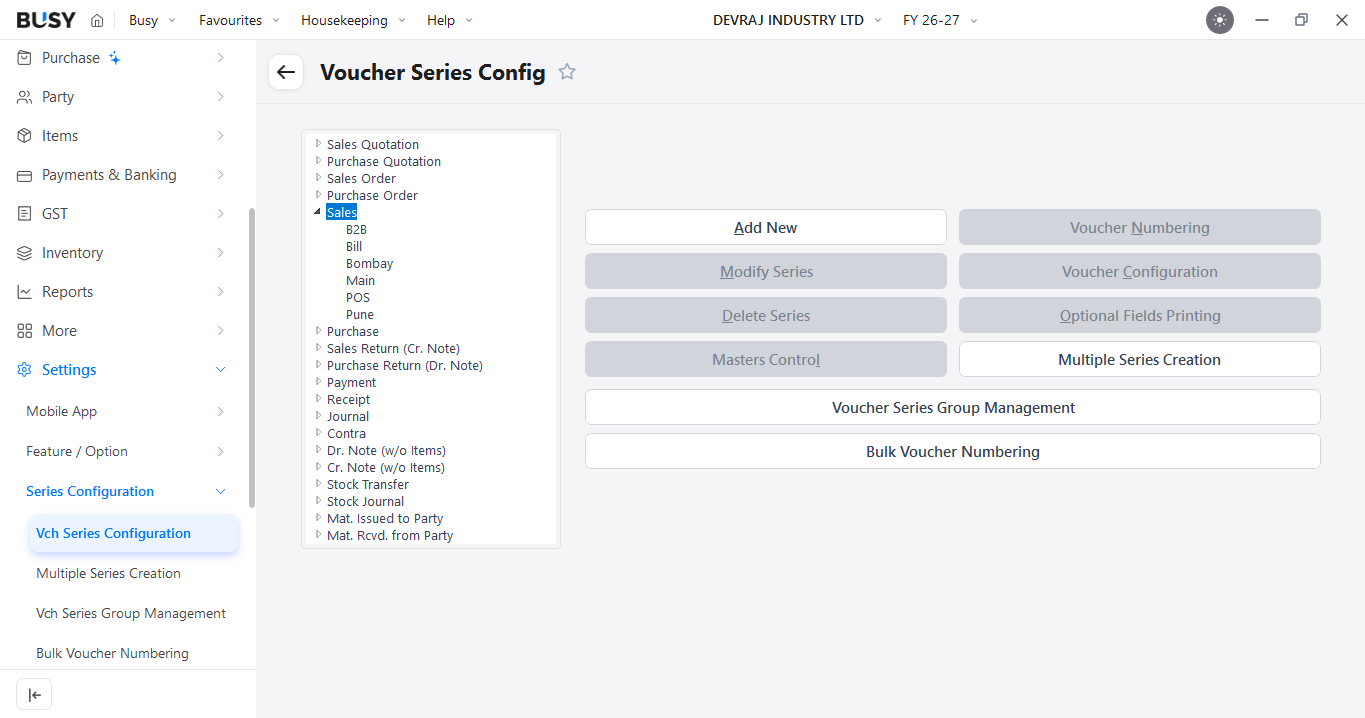
Go to Settings > Series Configuration > Voucher Series Configuration. Then select the required Voucher Type, such as Sales. If multiple users need separate billing series, create or select the required series.
Step 2: Configure Advanced Billing
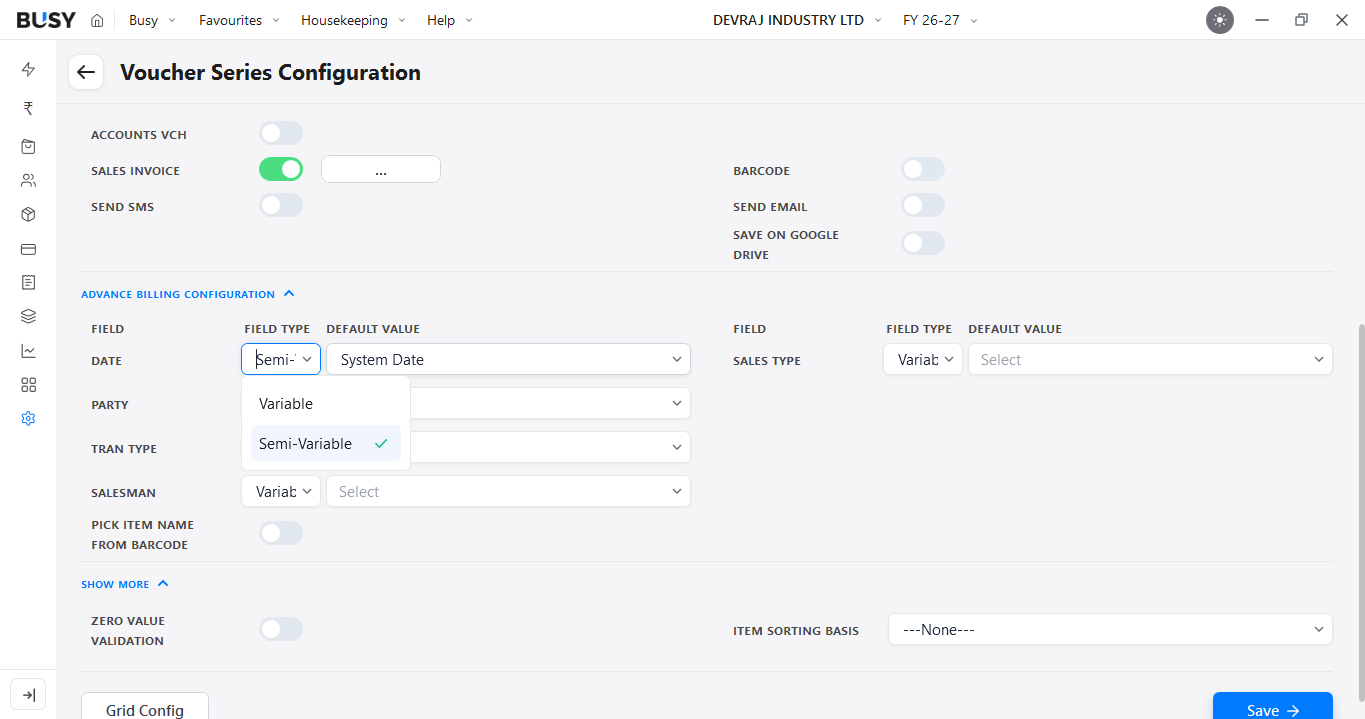
Click Voucher Configuration. Set the fields as required:
- Variable: The cursor automatically moves to the Date field and the date can be changed.
- Semi-Variable: The cursor does not automatically move to the Date field, but the date can still be changed manually.
- Fixed: The date cannot be changed manually.
For faster billing, the field can be kept Semi-Variable if you normally use the default date but still want the option to change it when required.
Step 3: Enable Barcode-Based Item Selection
.png)
In the voucher configuration, enable Pick Item Name from Barcode. Barcode-based selection can also be used for items where inventory is managed through details such as Serial Number, Batch Number and Parameters.
Set the Scanning Priority as required and Save the configuration. Once enabled, scanning a barcode directly identifies the item instead of opening the item-selection dropdown.
Step 4: Enable Settlement Details
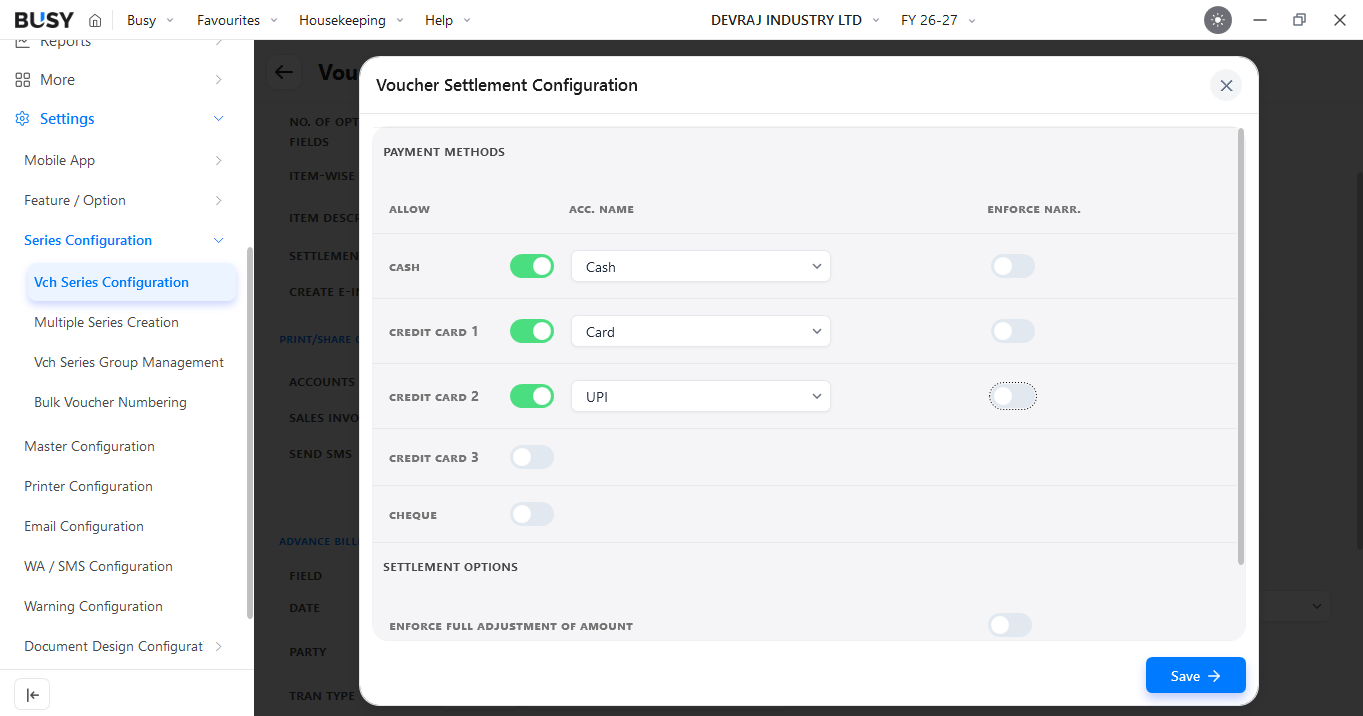
Go to Settings > Series Configuration > Voucher Series Configuration. Select the required Sales voucher series and open Voucher Configuration.
Then enable Settlement Details and add the required payment modes, such as Cash, Card, UPI, or Bank. Up to five settlement modes can be configured. Finally, Save the configuration.
Step 5: Add Barcodes to Items
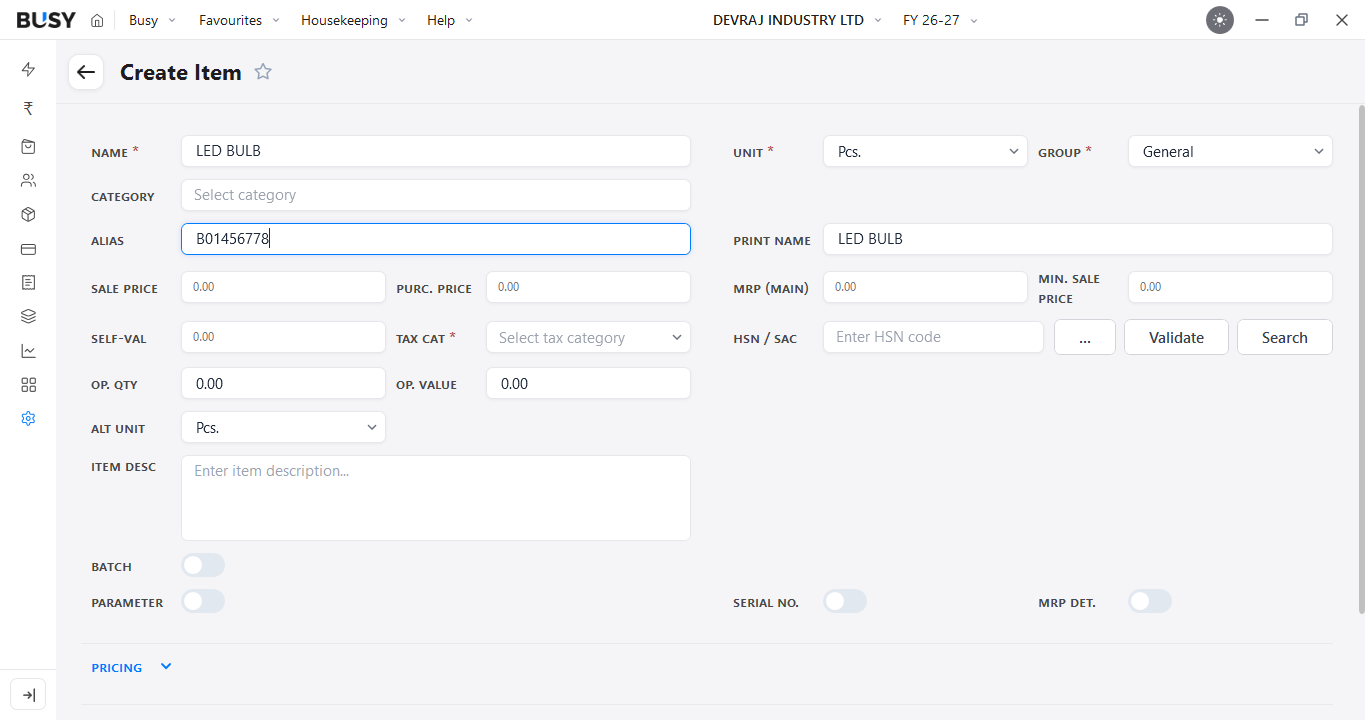
A barcode can be linked with an item using its Alias. Open the required item master and enter the barcode number in the Alias field. Then Save the item.
When the barcode is scanned during billing, BUSY identifies the corresponding item and automatically fetches its available details.
Create a POS Bill
Step 6: Scan Items While Creating the Invoice
.png)
Open a new Sales Invoice and scan the product barcode. BUSY will identify the item and automatically fill the relevant details.
Step 7: Handle Items Without a Valid Barcode
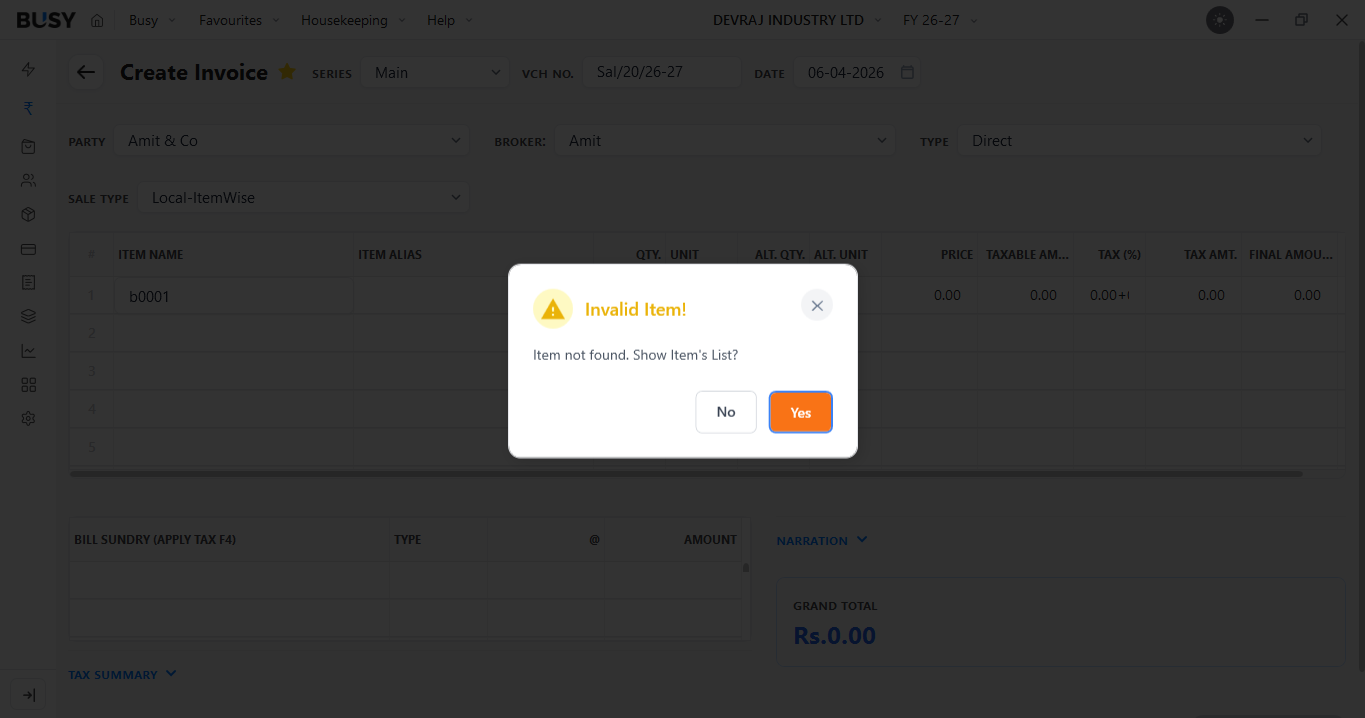
If a scanned barcode is not recognized, BUSY displays an Invalid Item warning. Click Yes to open the Item List and manually select the item. Alternatively, press F4 to open the Item List and select the required item manually when a barcode is not available.
Step 8: Enter Payment Settlement
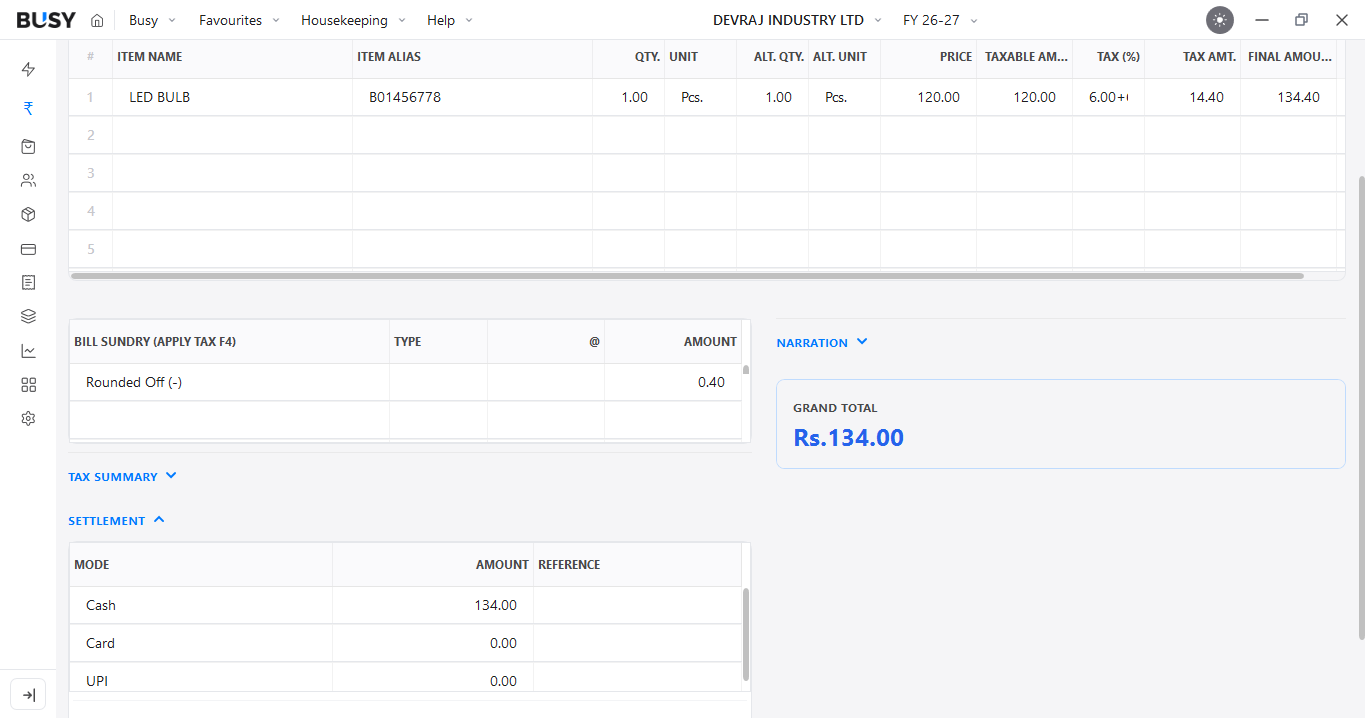
Open the Settlement window available at the bottom of the invoice and select the required payment mode.
The full amount can be recorded through one payment mode, such as Cash, or divided across multiple configured settlement modes.
Step 9: Save and Print the Invoice
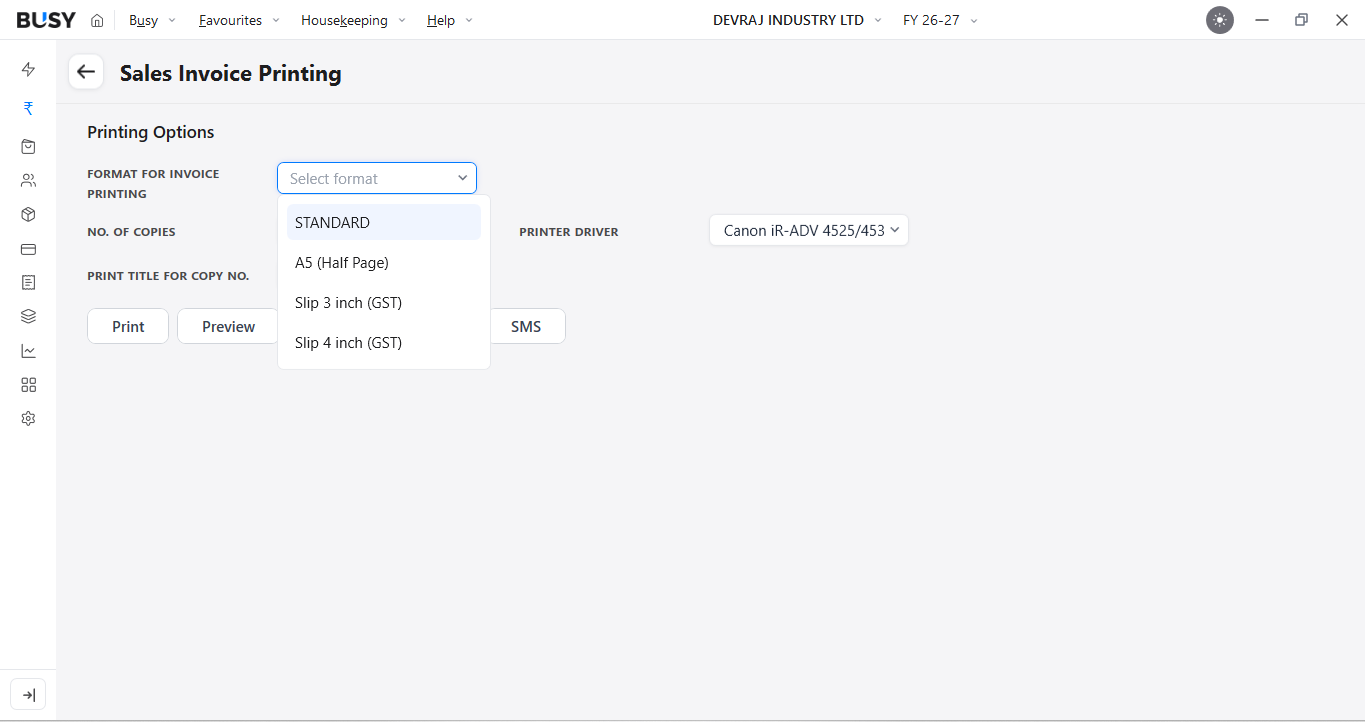
Review the invoice and settlement details, then click Save. Select the required print format, such as A5 (Half Page), Slip 3-inch, Slip 4-inch, or Standard, and print the invoice. The invoice can then be shared with the customer.
What Our Customers Say
Real experiences from businesses across India.
Flexible Plans for Every Business
Paid plans start at just ₹5,000/year. Whatever your size, from small business to scaling enterprise, there's a BUSY plan built for you, so pick what you need today and upgrade anytime.
Enjoy More Accounting Benefits With BUSY
Free Mobile App for access on the go
Complete control over the User Activity Log
Auto-Backup through Google Drive