Approval Management System in BUSY
When multiple users handle accounting, inventory, or billing operations, businesses need a system to review important transactions before they are finalised. Approval management helps businesses set predefined workflows, ensure proper checks, and maintain better control over day-to-day activities.
Keep Business Decisions Under Control
Review important vouchers and masters, assign approval responsibilities, and maintain better operational control.
Trusted by Businesses, Rated by Experts


How BUSY Helps You Manage Approvals Efficiently
Set Approval Workflows for Vouchers & Masters
Assign Approval Rights Based on User Roles
Review, Approve or Reject Transactions with Remarks
Track Approval Activities Through Detailed Reports
How to Configure Approval in BUSY
Step 1: Enable Approval Feature
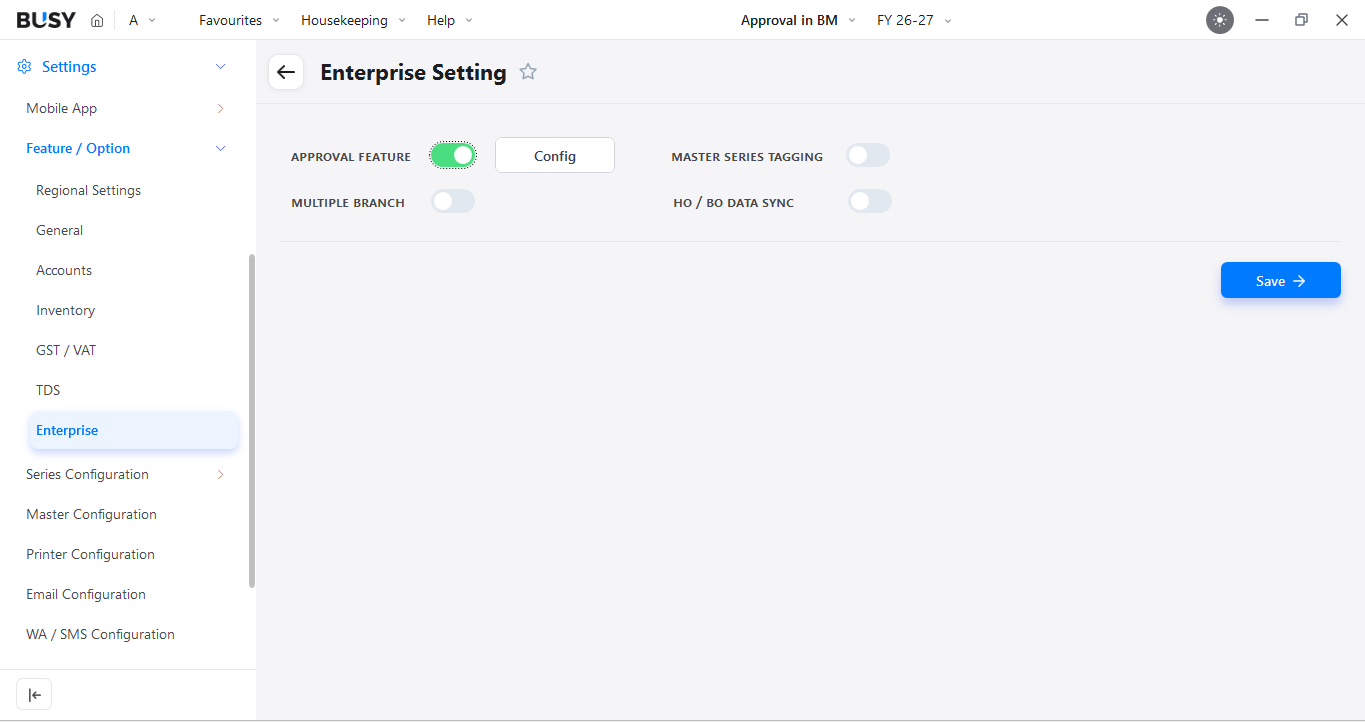
Go to Settings > Feature/Option > Enterprise and enable the Approval feature.
To configure approvals, at least one user must be created, or a Super User must already exist. Click Configure to set up approval rules.
Step 2: Select Approval Type
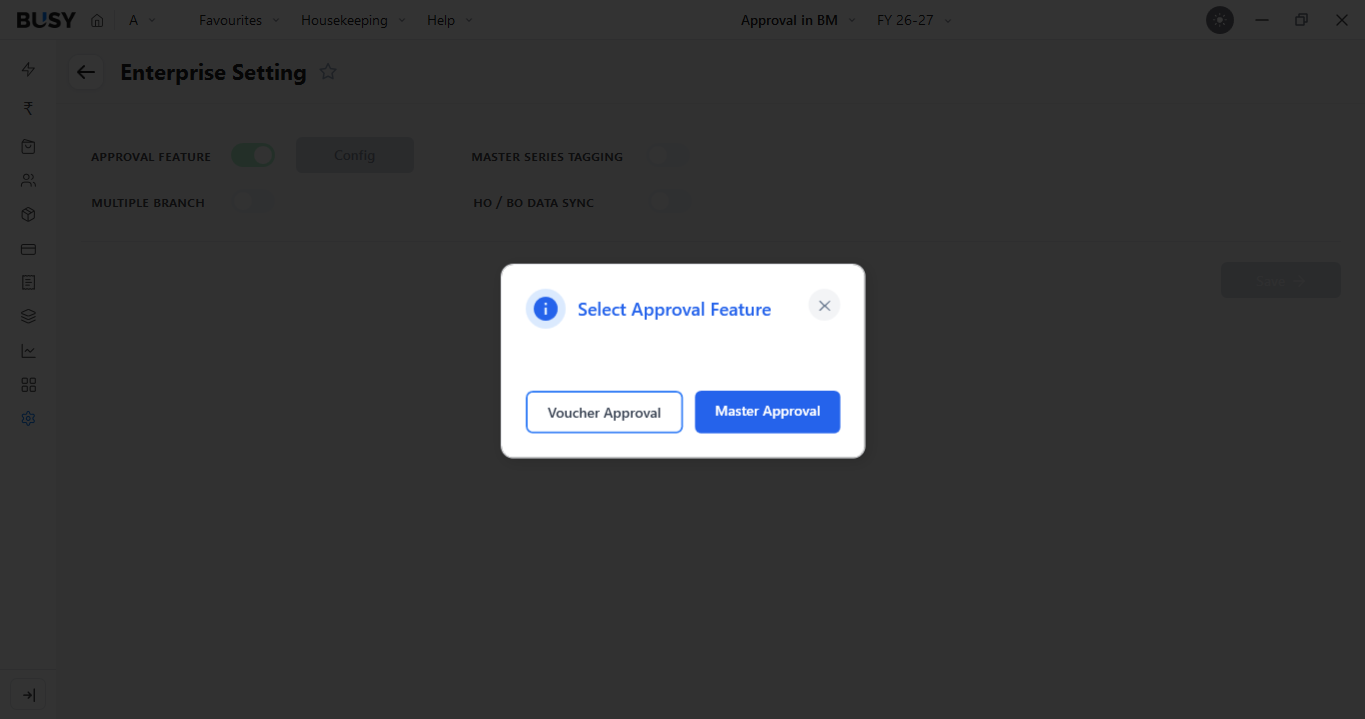
A Select Approval Feature window will open. Choose whether you want to apply approval on Voucher or Master.
Master Approval
Step 3: Select Master Type
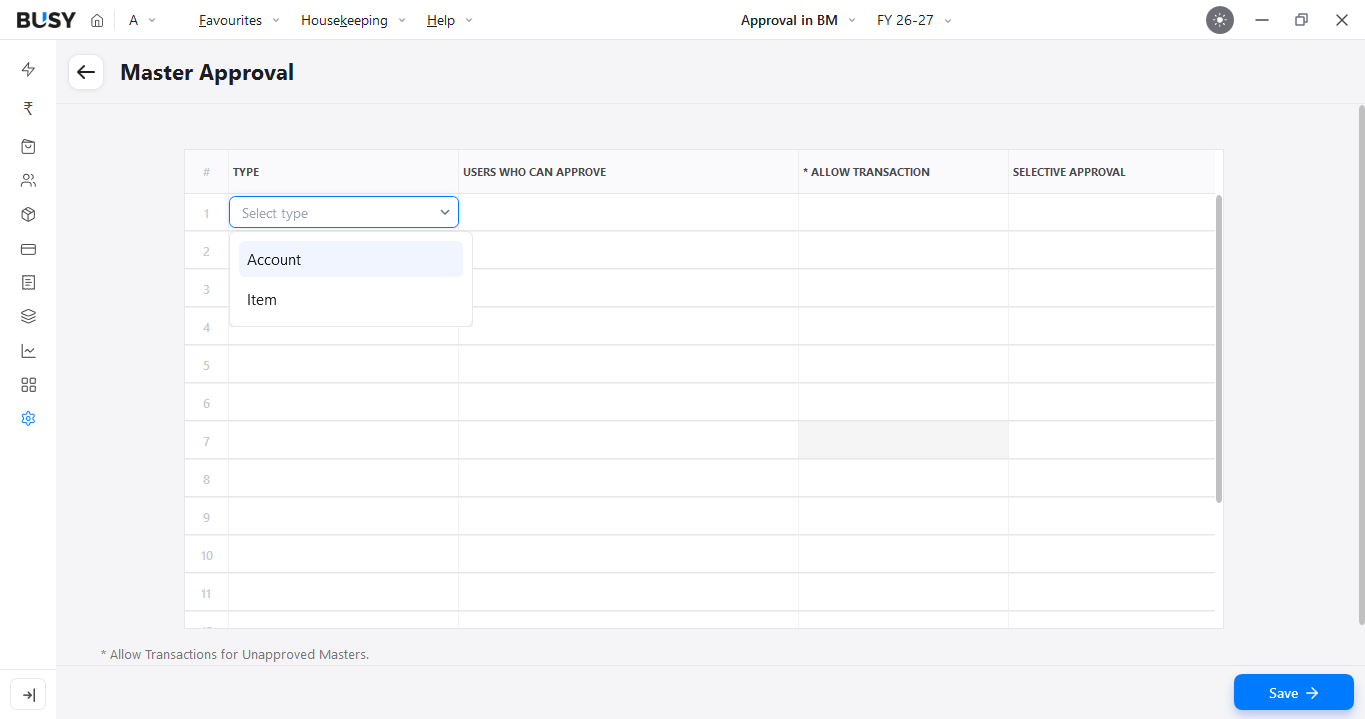
Select the type of master for which you want to enable approval. You can choose Account or Item.
Step 4: Select Users Who Can Approve
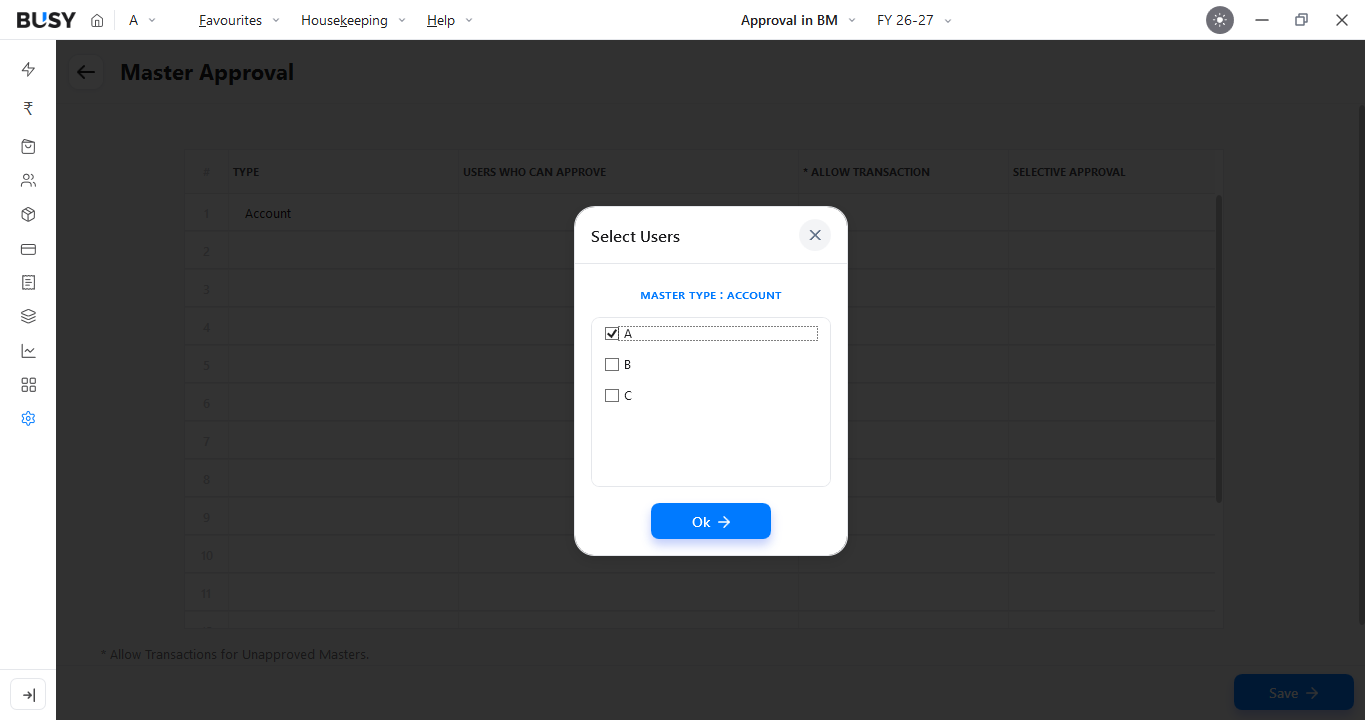
Under Users Who Can Approve, select the users who should have approval rights. The Super User is selected by default and cannot be removed.
Step 5: Configure Transaction Permission
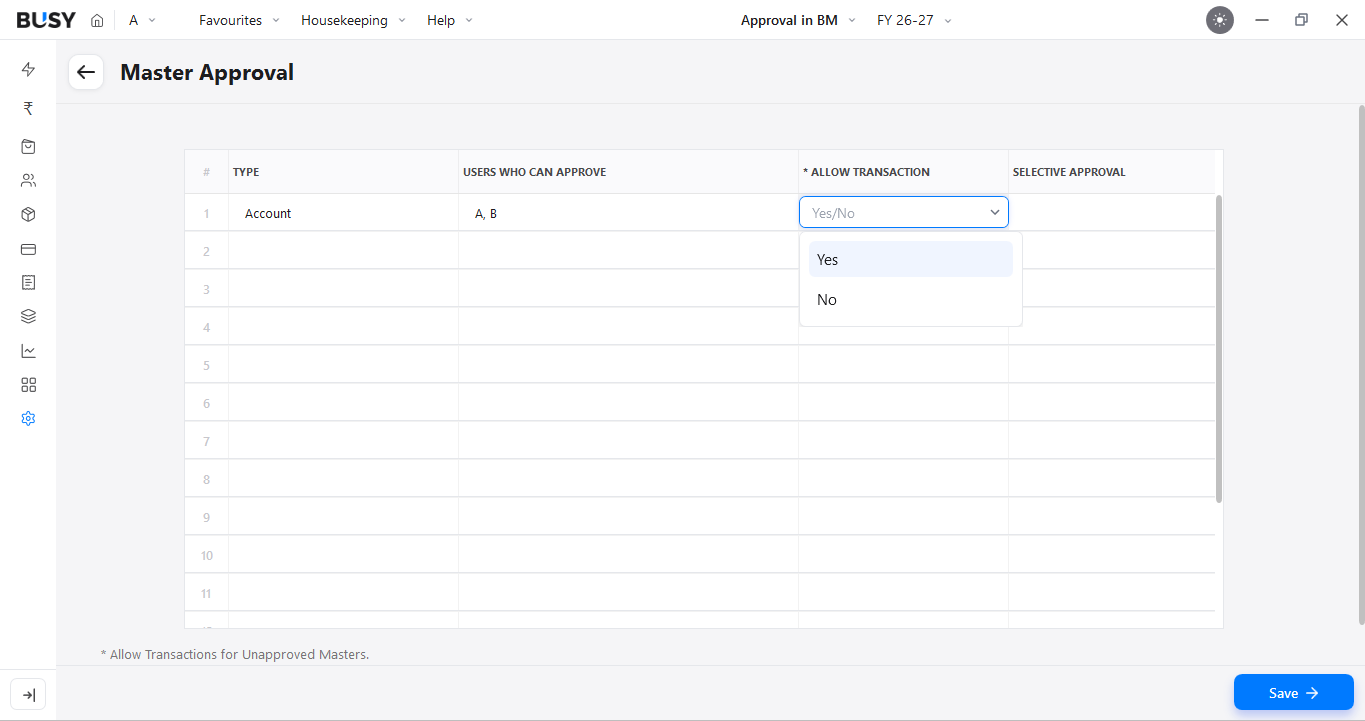
Select whether users can create transactions without approval using the Allow Transaction option.
Choosing Yes will allow transactions without approval. Whereas choosing No will restrict transactions until approval is completed.
Step 6: Configure Selective Approval
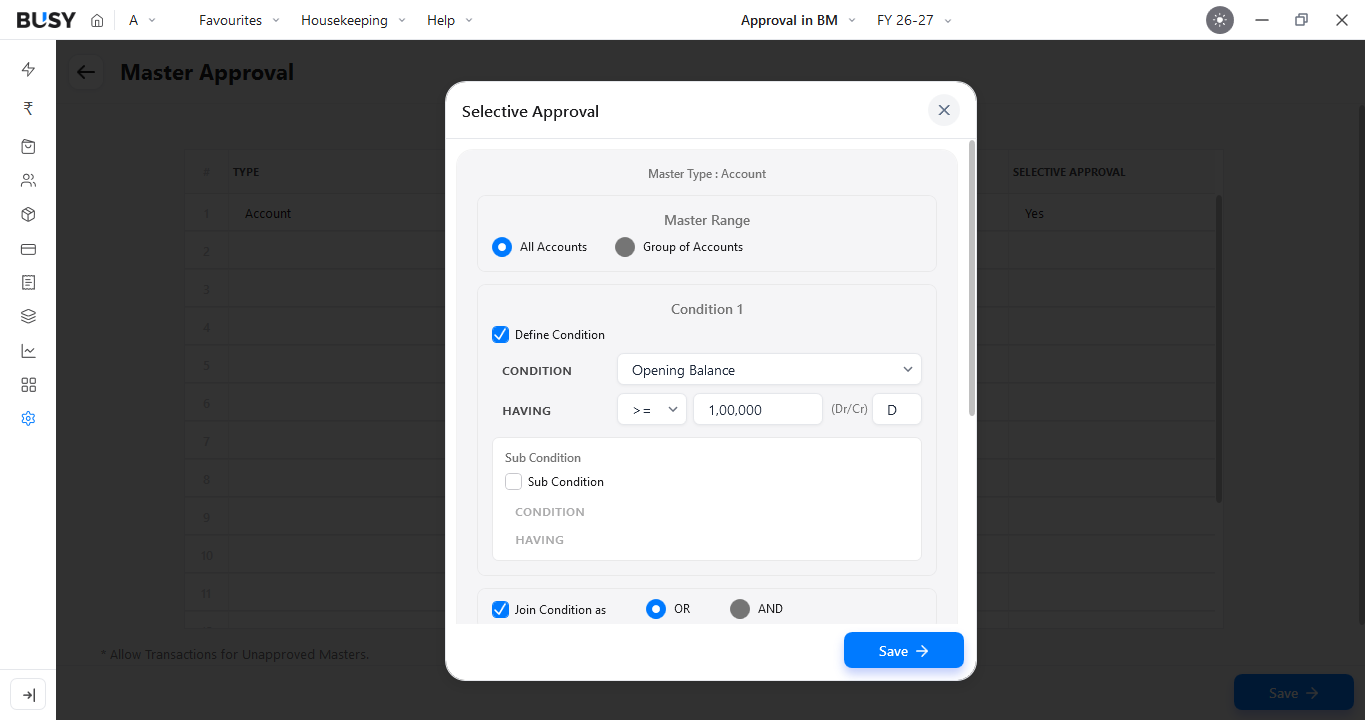
Use Selective Approval if you want approval to be triggered only when specific conditions are met. For example, you can configure approval for cases where an opening balance exceeds ₹1,00,000.
Configure the required conditions in the Selective Approval window that opens. You can apply up to two conditions while setting up selective approval.
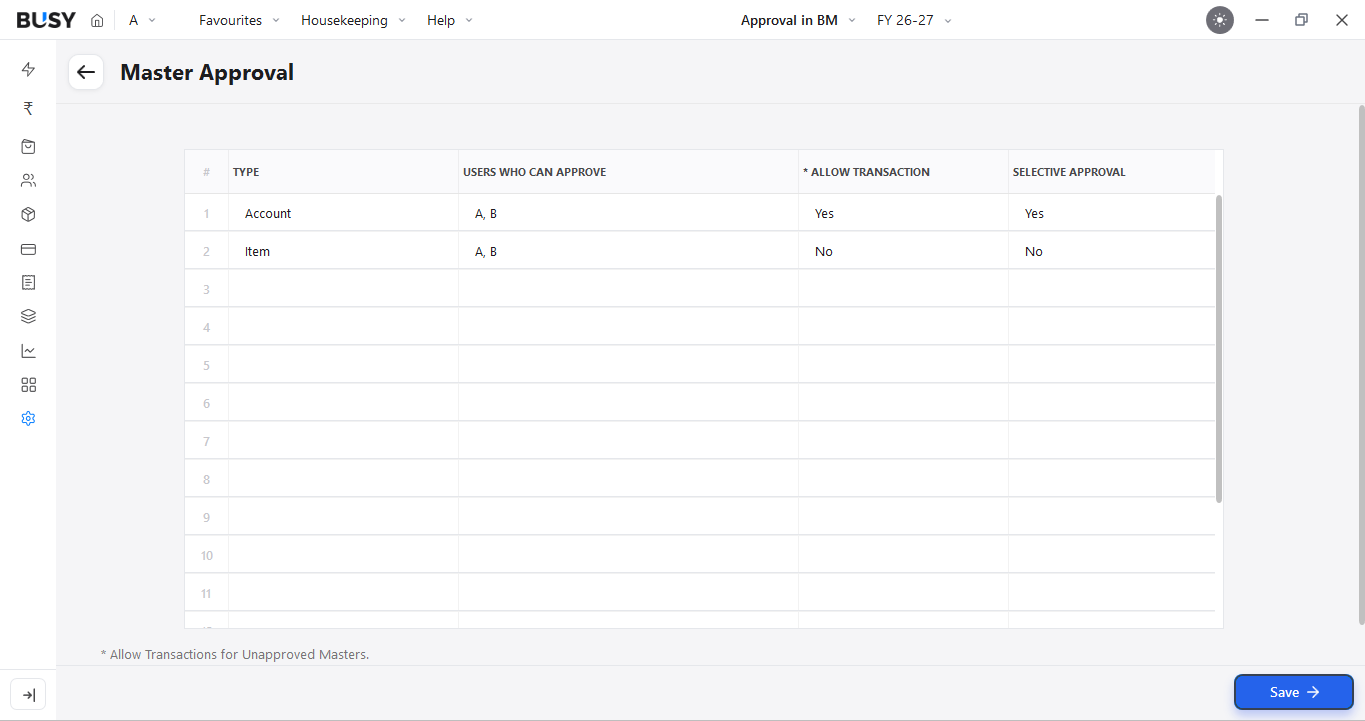
Step 7: Save Your Preferences
Save the approval configuration. Users who do not have permission to use a particular account or item during transactions will not be able to select it.
Voucher Approval
Step 8: Configure Voucher Approval
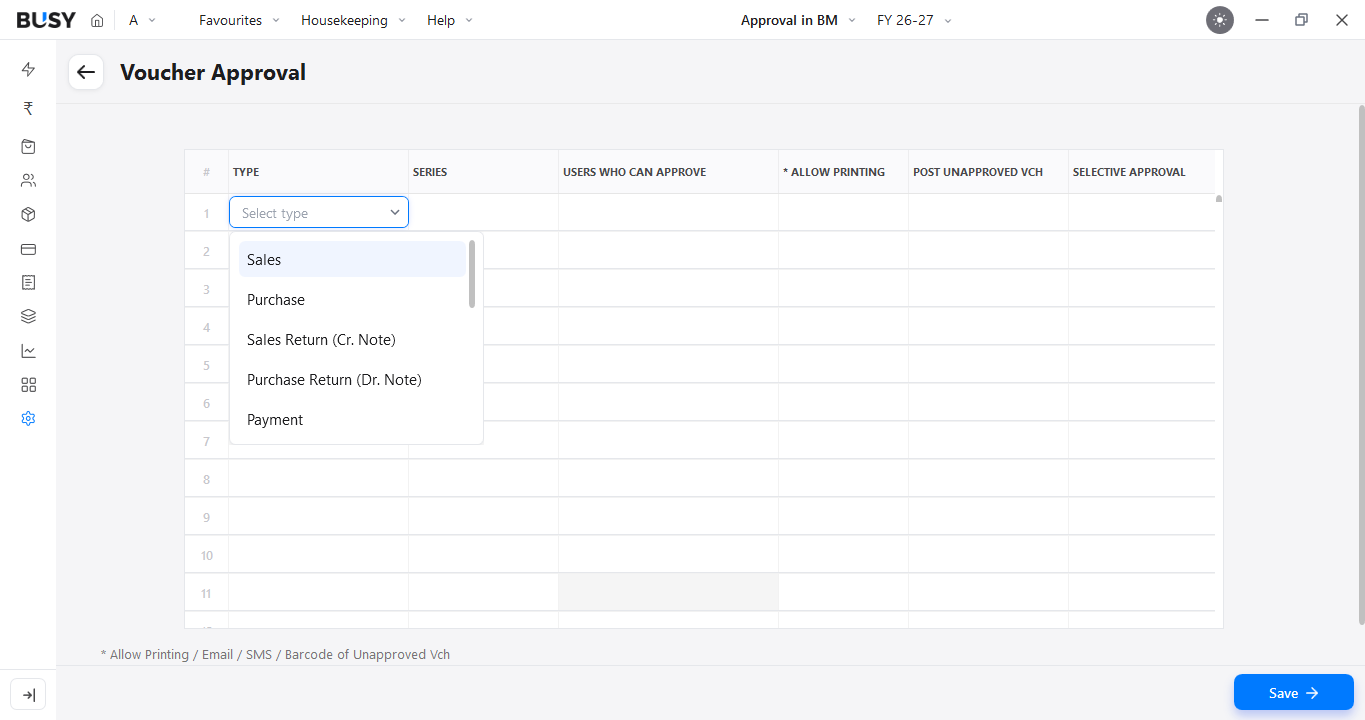
In the Approval configuration window, select Voucher. Choose the required voucher type from the drop-down menu.
Step 9: Configure Voucher Approval Settings
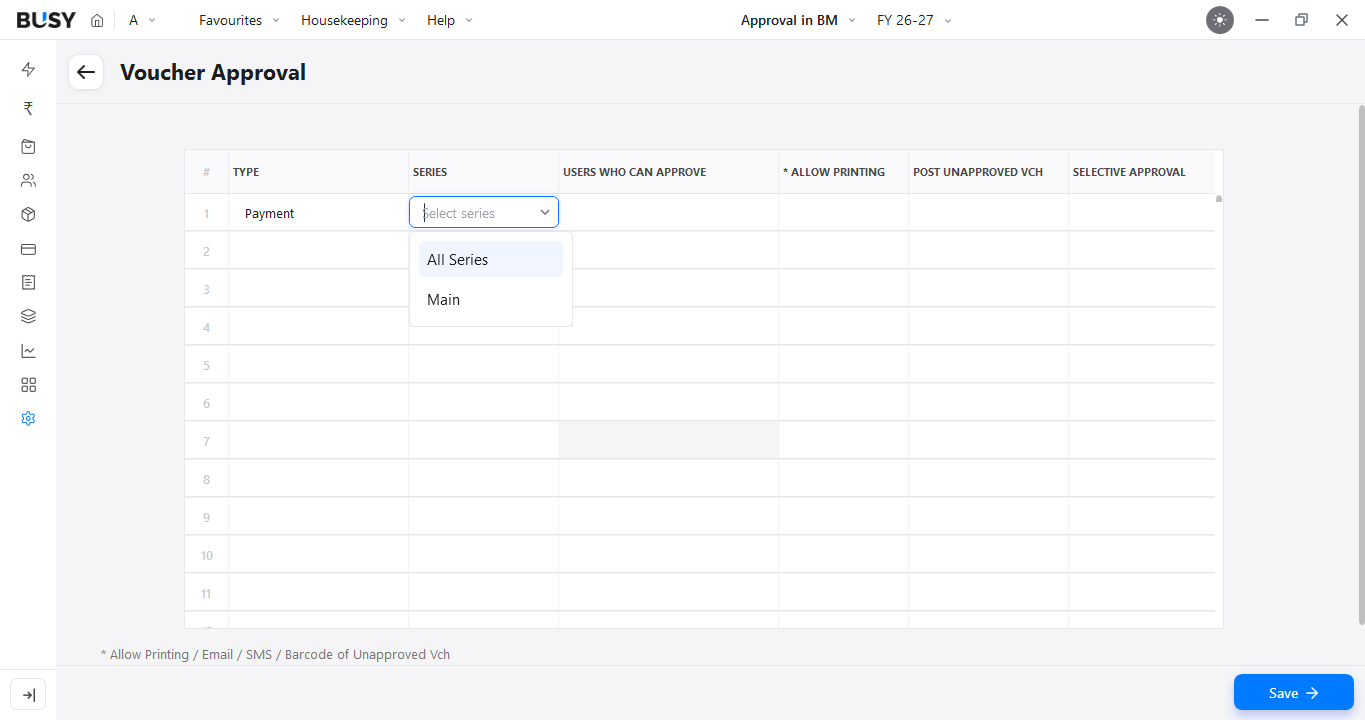
Select the voucher series for which approval is required. You can choose All Series or a specific series such as Main.
Step 10: Configure Who Can Approve
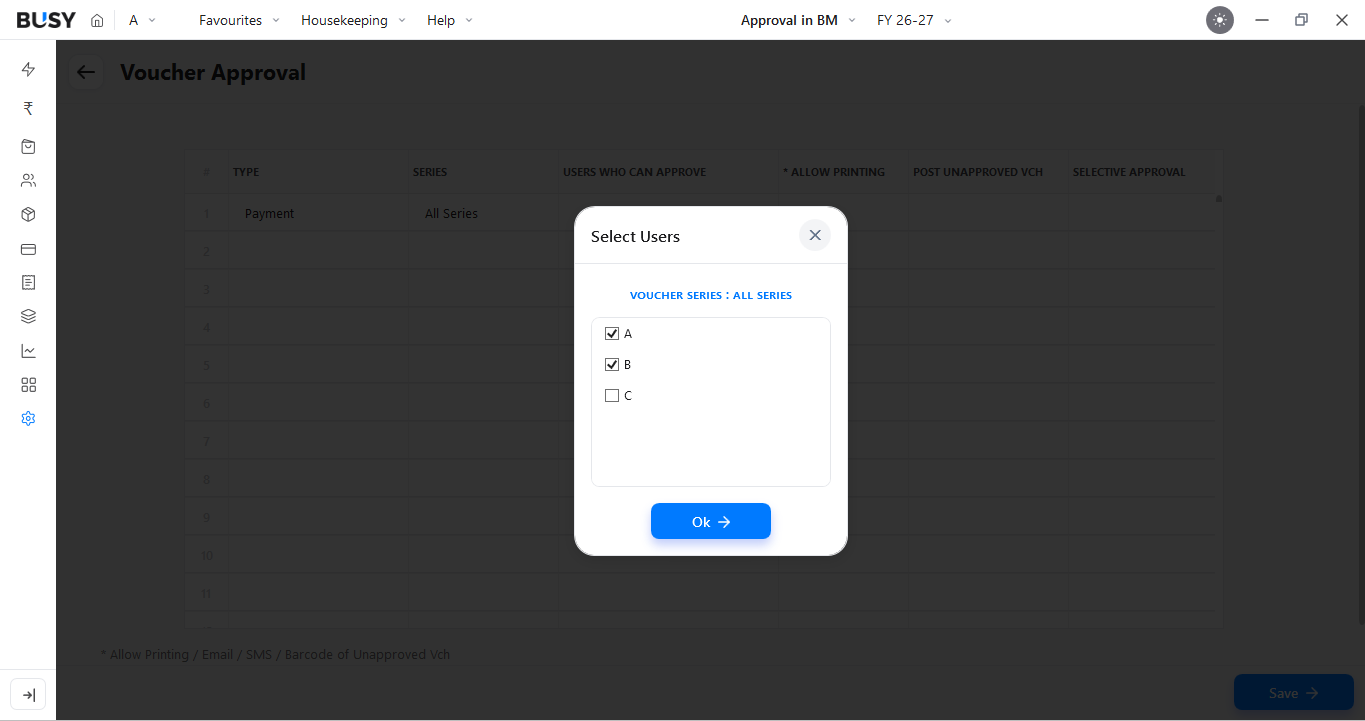
Under Users Who Can Approve, select the users who should have approval rights.
Step 11: Configure Printing Permissions
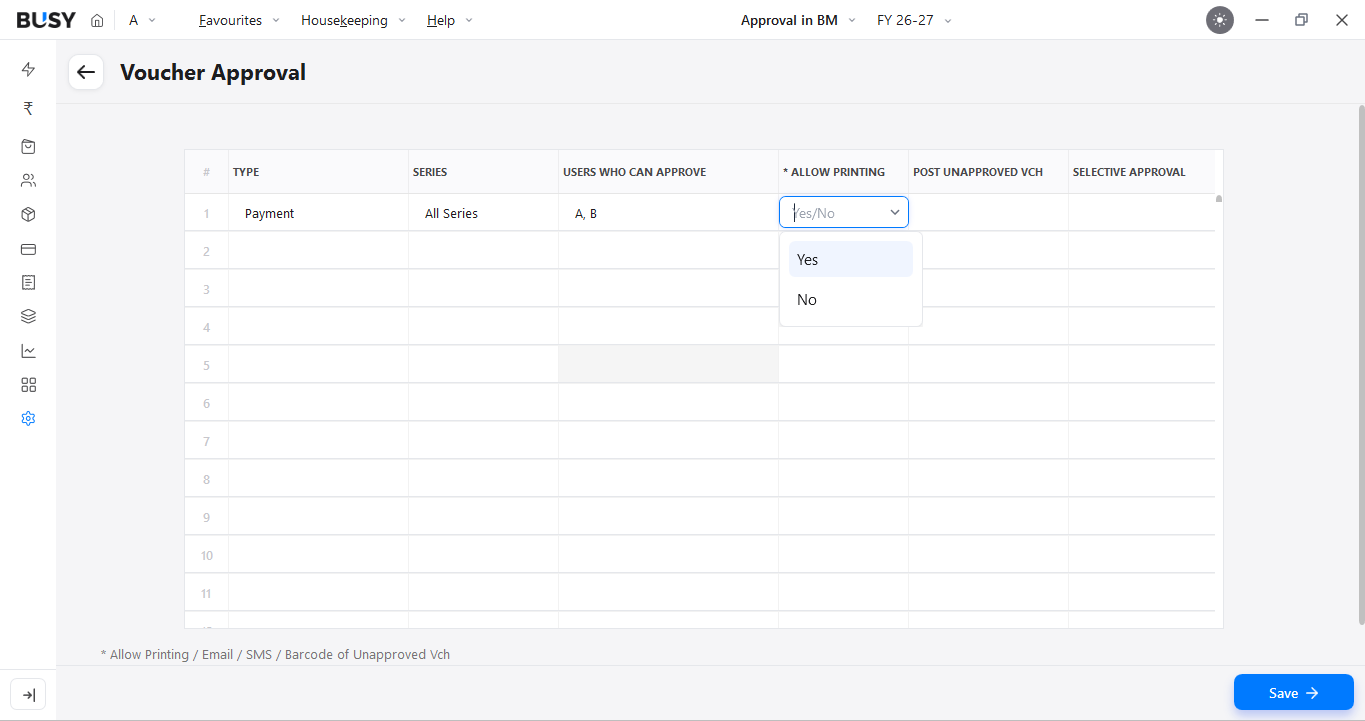
Decide whether the selected users can print vouchers before approval.
Step 12: Configure Post Unapproved Voucher Permissions
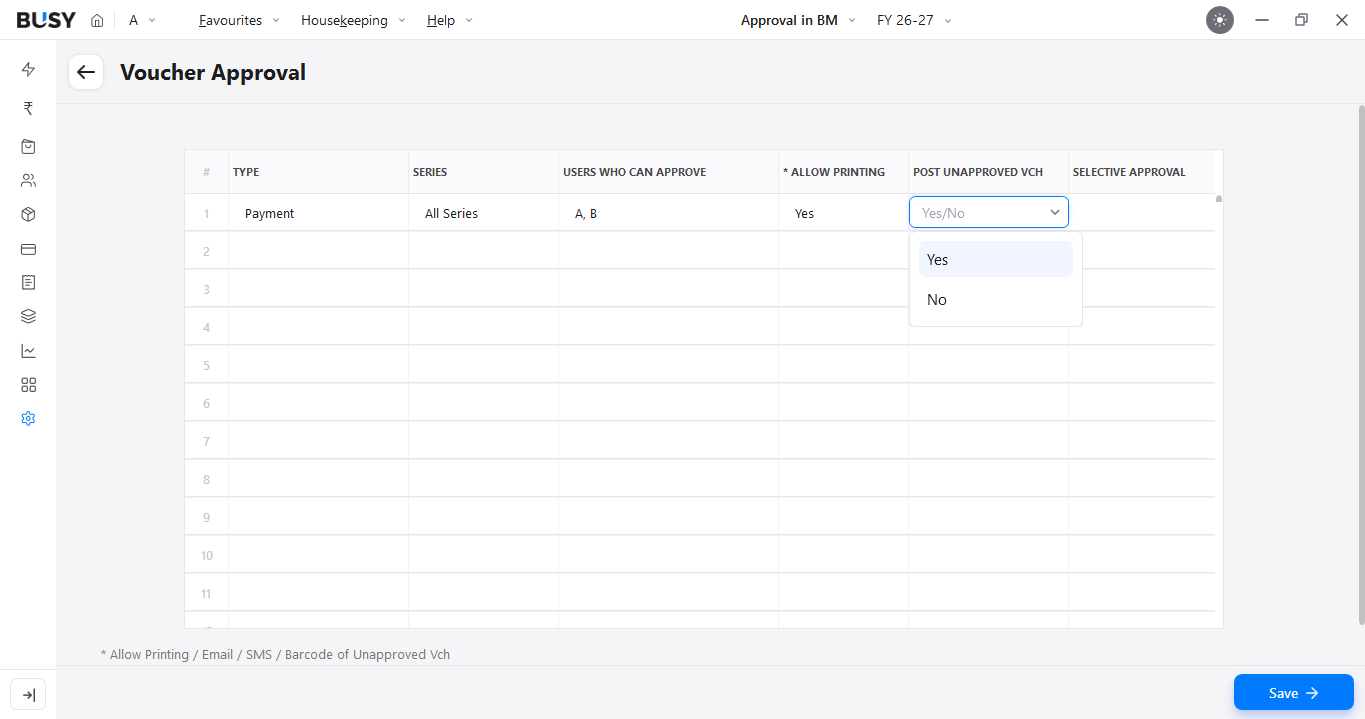
Select whether accounting entries should be posted before approval.
Step 13: Configure Selective Approval for Vouchers
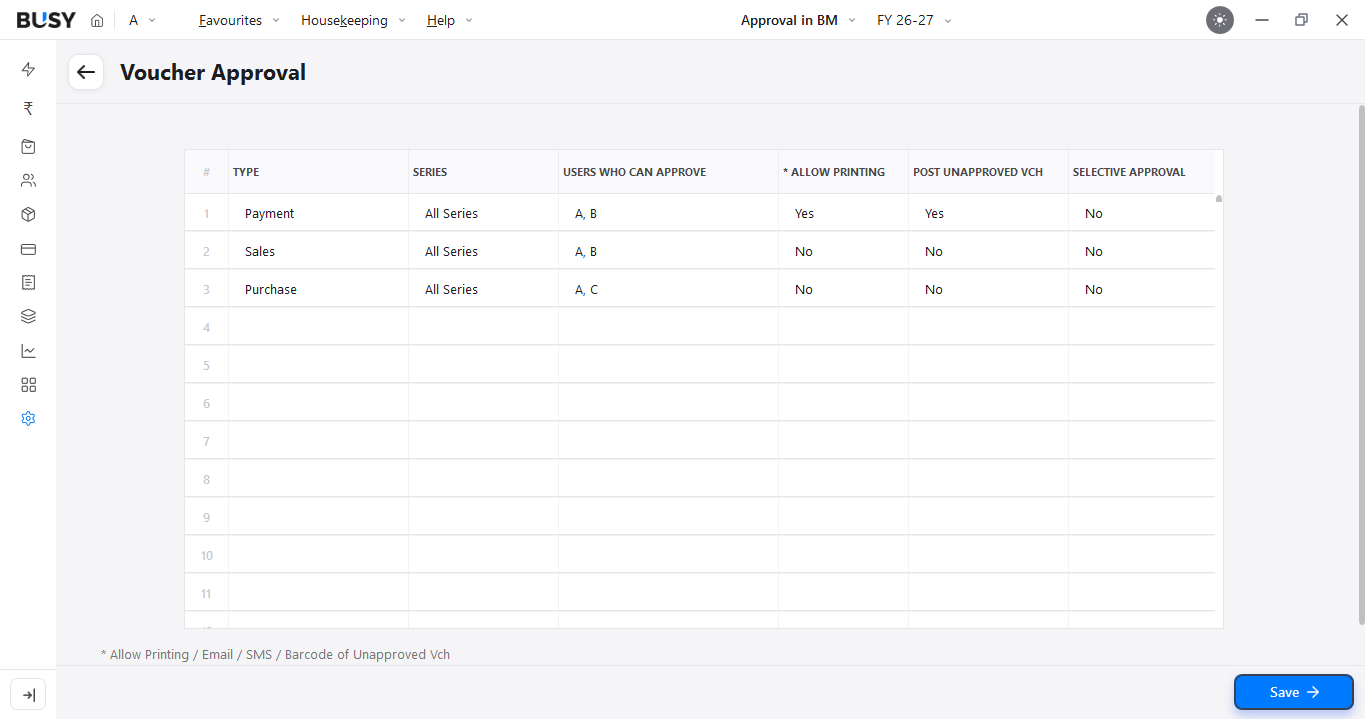
Enable Selective Approval if approval should be required only for specific conditions. Configure the required conditions in the Selective Approval window. You can apply up to two conditions while setting up selective approval.
Save the overall approval configuration.
Approving Masters and Vouchers
Step 14: Open Approval Window
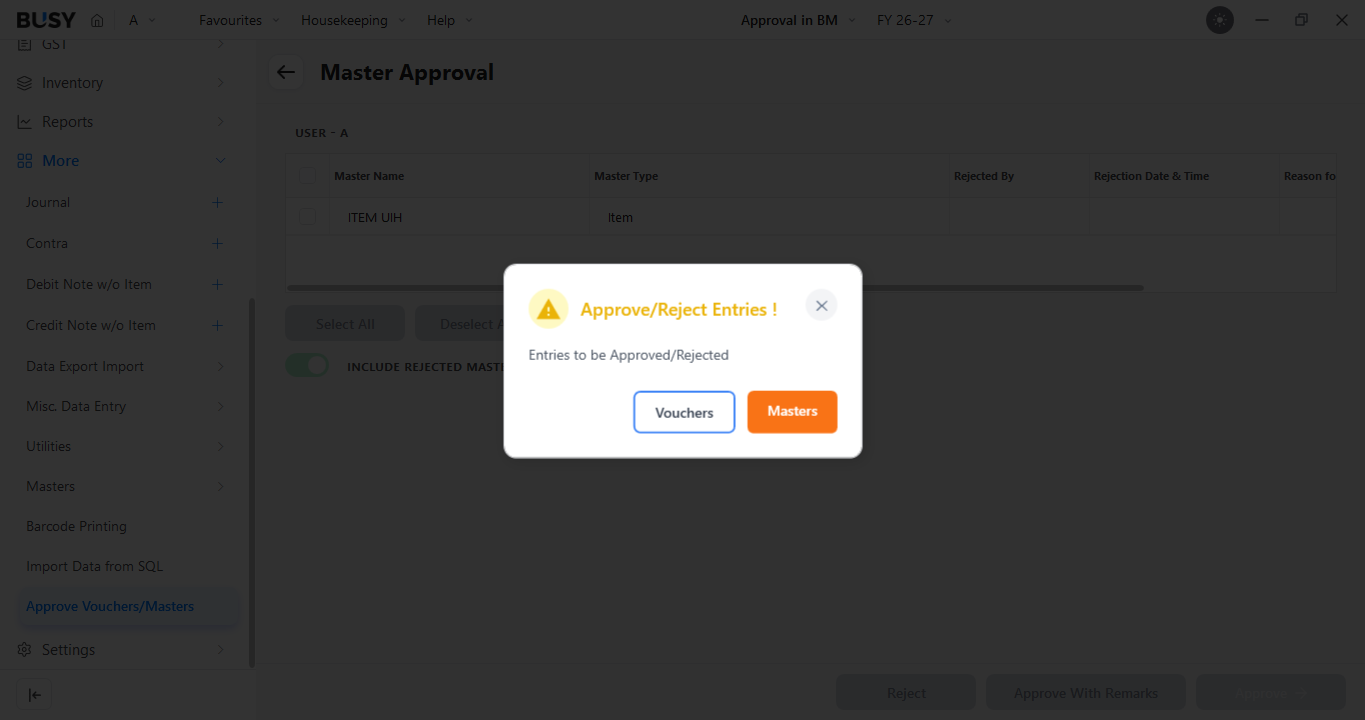
Users with approval rights can go to More > Approve Voucher/Masters, where BUSY will ask whether you want to approve Voucher or Master. Select the required option.
Step 15: Review and Take Action
Review the pending approvals. You can select the required action:
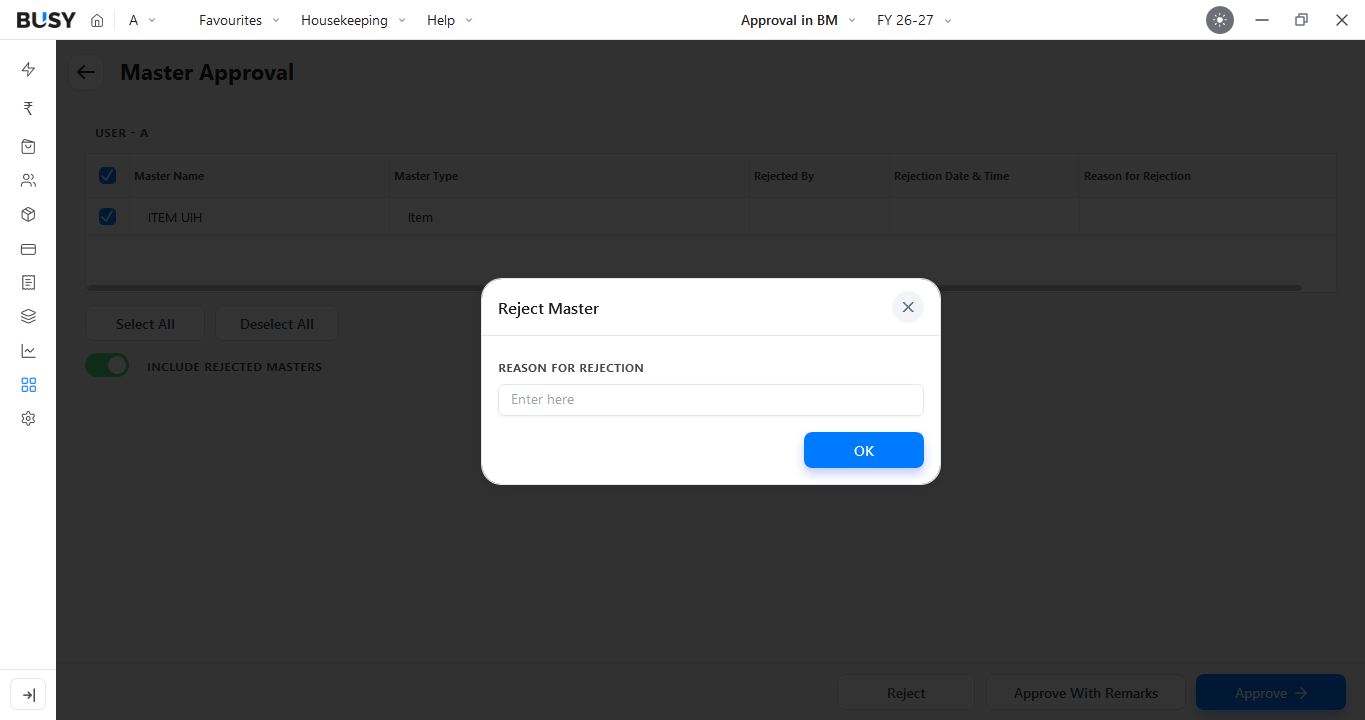
- Reject: Reject the voucher/master and enter remarks.
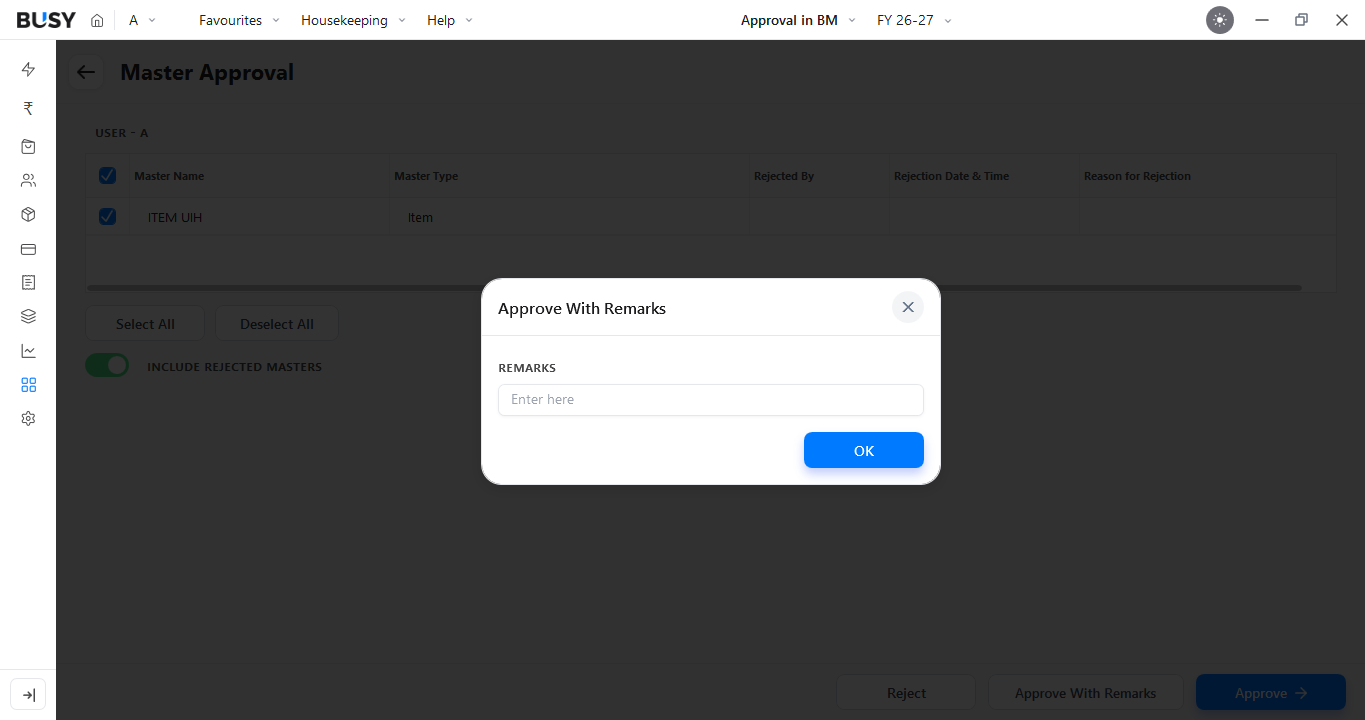
- Approve with Remarks: Approve and add remarks if required.
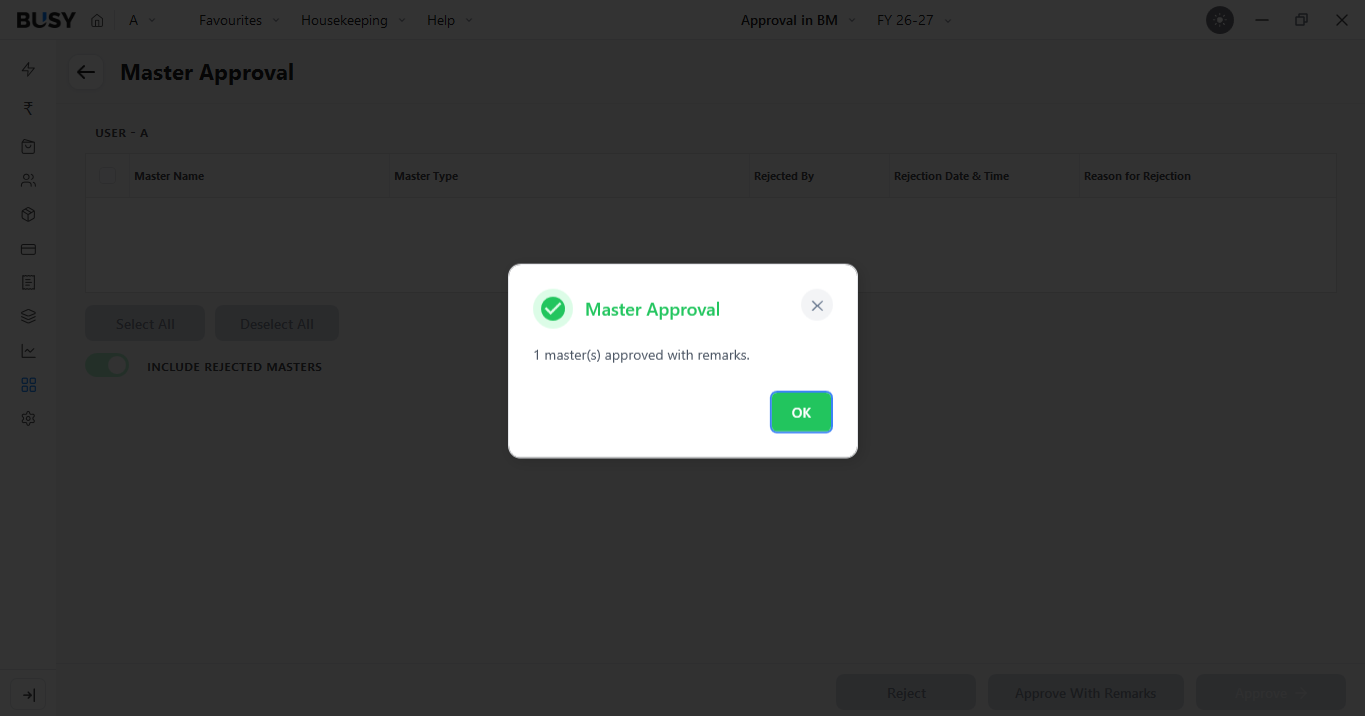
- Approve: Approve without adding remarks.
Step 16: Review and Select Vouchers for Approval
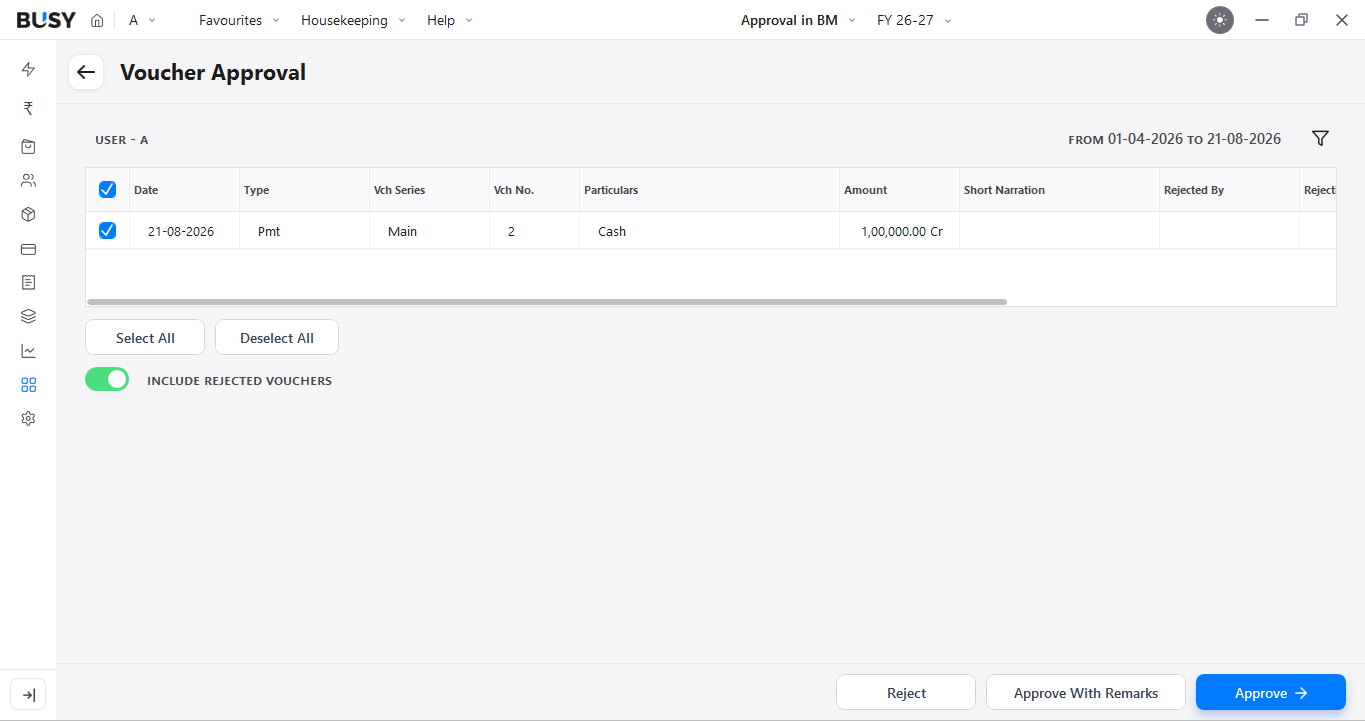
Review the pending vouchers in the approval window. Enable Include Rejected Vouchers to view rejected vouchers along with pending approvals.
If you want to approve multiple vouchers together, use the Select All option to select the required vouchers. After selecting the vouchers, you can take the required action:
- Reject: Reject the voucher and enter remarks.
- Approve with Remarks: Approve the voucher with additional comments.
- Approve: Approve the voucher directly.
Approval Report
Step 17: View Approval Report
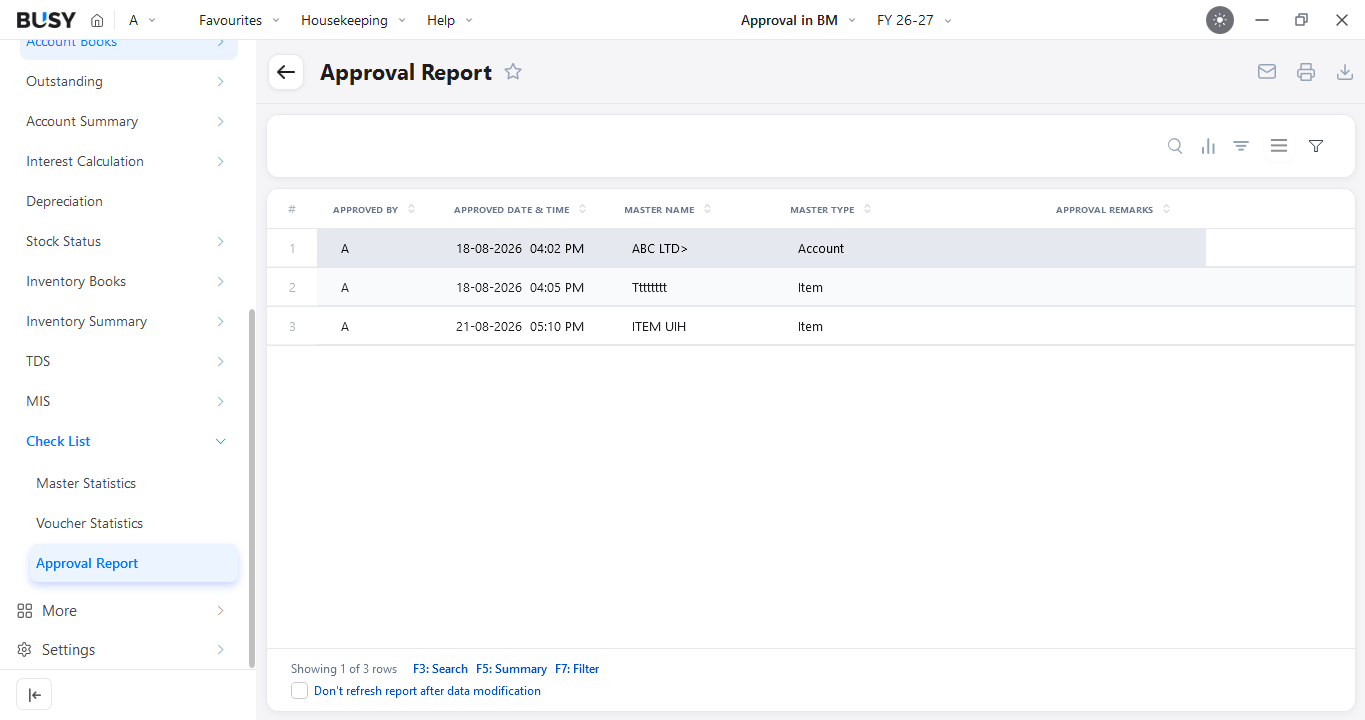
Go to Reports > Check List > Approval Report. Use Advanced Filters to customise the report and view approval details based on your requirements.
This report will show all the necessary particulars for every approval that took place.
What Our Customers Say
Real experiences from businesses across India.
Flexible Plans for Every Business
Paid plans start at just ₹5,000/year. Whatever your size, from small business to scaling enterprise, there's a BUSY plan built for you, so pick what you need today and upgrade anytime.
Enjoy More Accounting Benefits With BUSY
Free Mobile App for access on the go
Complete control over the User Activity Log
Auto-Backup through Google Drive