Multi-Location Inventory Management in BUSY
Businesses with multiple shops, warehouses, branches, or godowns need a clear view of stock availability across locations. Managing inventory separately can make it difficult to track stock levels, identify shortages, and transfer goods when required. A centralised inventory system helps businesses maintain better control and make informed stock decisions.
Every Warehouse. One Clear View.
Know where your stock is and manage transfers across locations with BUSY.
Trusted by Businesses, Rated by Experts


How BUSY Helps You Manage Stock Across Locations
Track Stock Across Multiple Locations
Transfer Goods Between Locations Easily
View Overall Inventory Position Instantly
Maintain Organised Location-Wise Stock Records
How to Use Multi-Location Inventory in BUSY
Step 1: Enable Multi-Warehouse Inventory
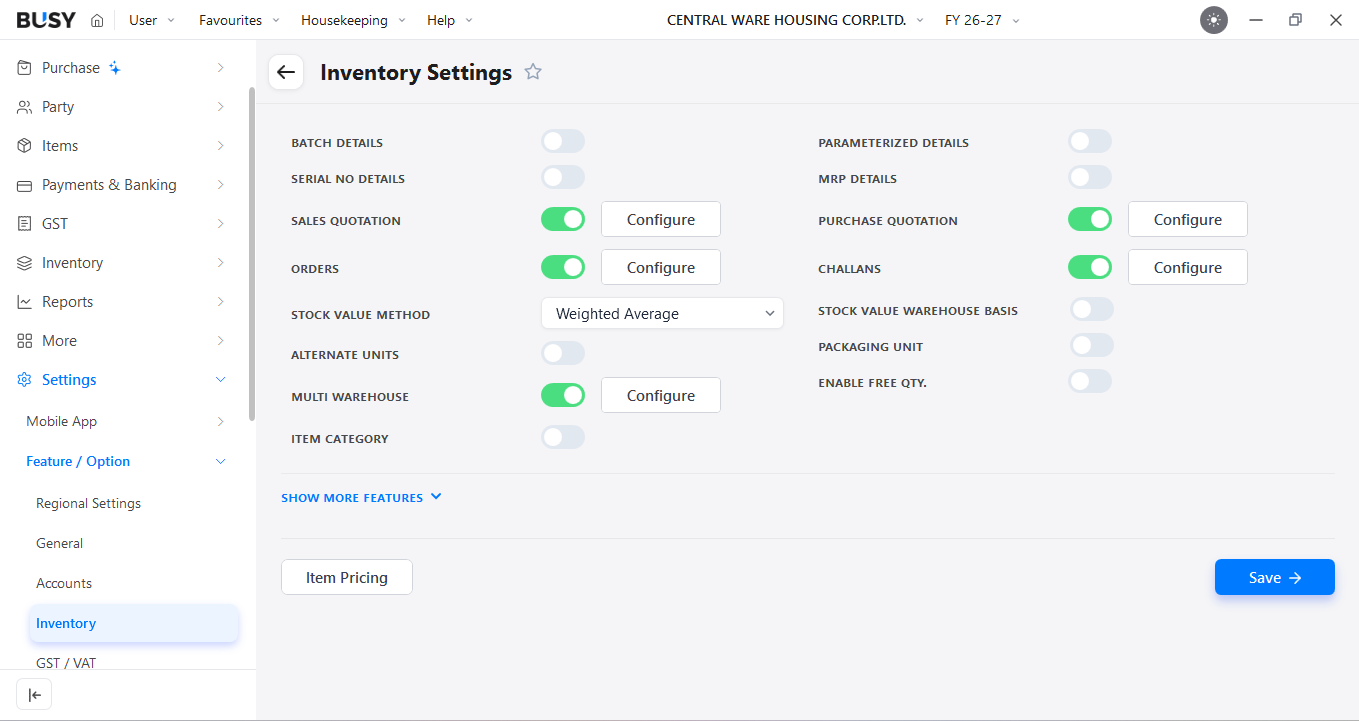
Go to Settings > Features/Options > Inventory and enable Multi-Warehouse. You can also enable warehouse selection at the Item Level here. Note that once Item-Level Warehouse is enabled, it cannot be disabled or changed back to voucher-level selection.
You can either keep warehouse selection at the Voucher Level or enable it at the Item Level, depending on how you manage inventory.
Step 2: Create Warehouses
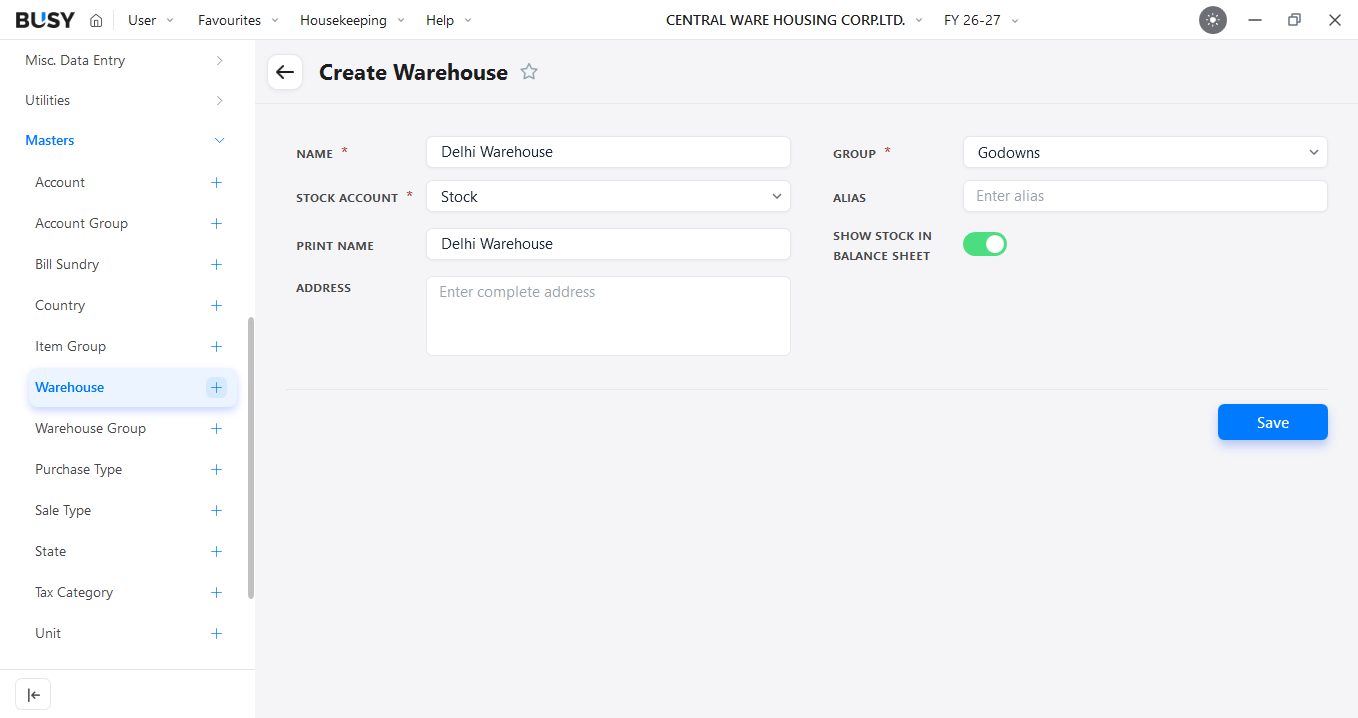
Go to More > Masters > Warehouse. A Main Store will be available by default. Click the + button to create another warehouse, enter the required details (such as the warehouse name), and click Save.
Step 3: Create Warehouse Group (optional)
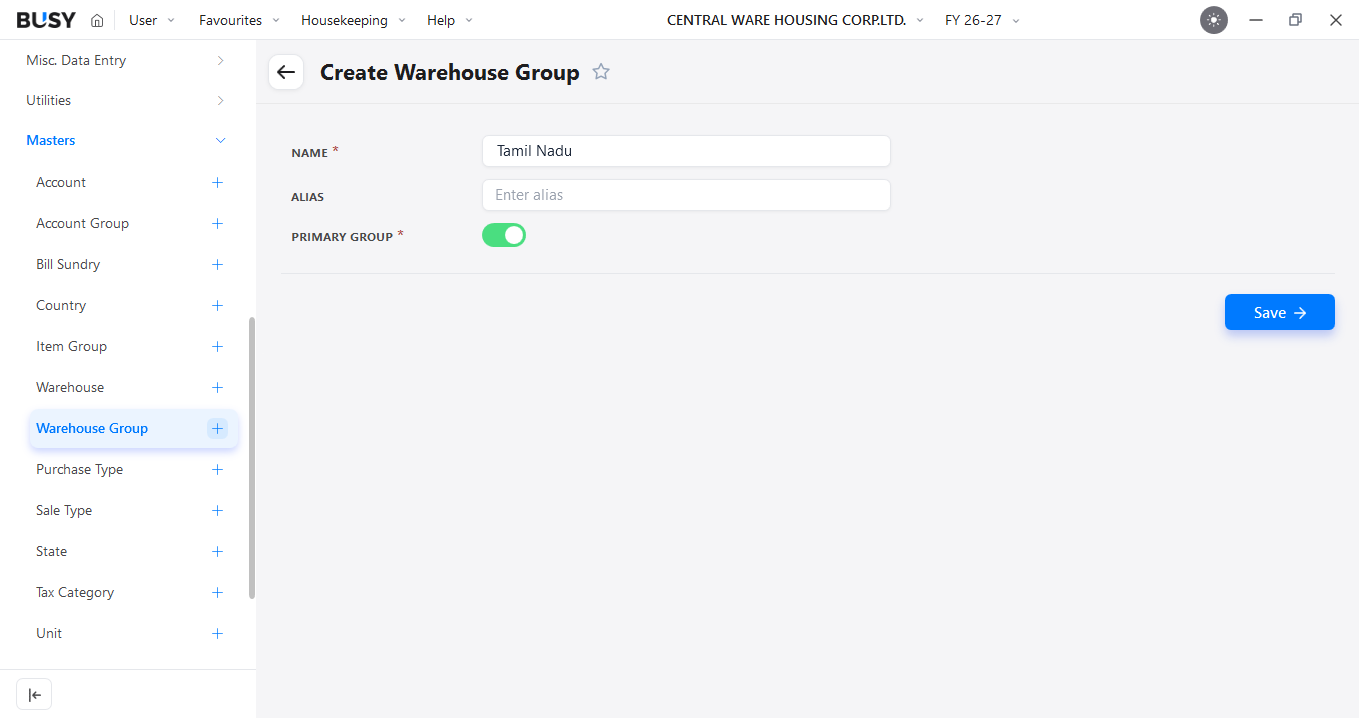
If you have multiple warehouses at the same location, you can create Warehouse Groups to organise them together.
Step 4: Create a Voucher
Select the required voucher, such as Sales, Purchase, or Delivery Challan.
Case 1: Warehouse at Voucher Level
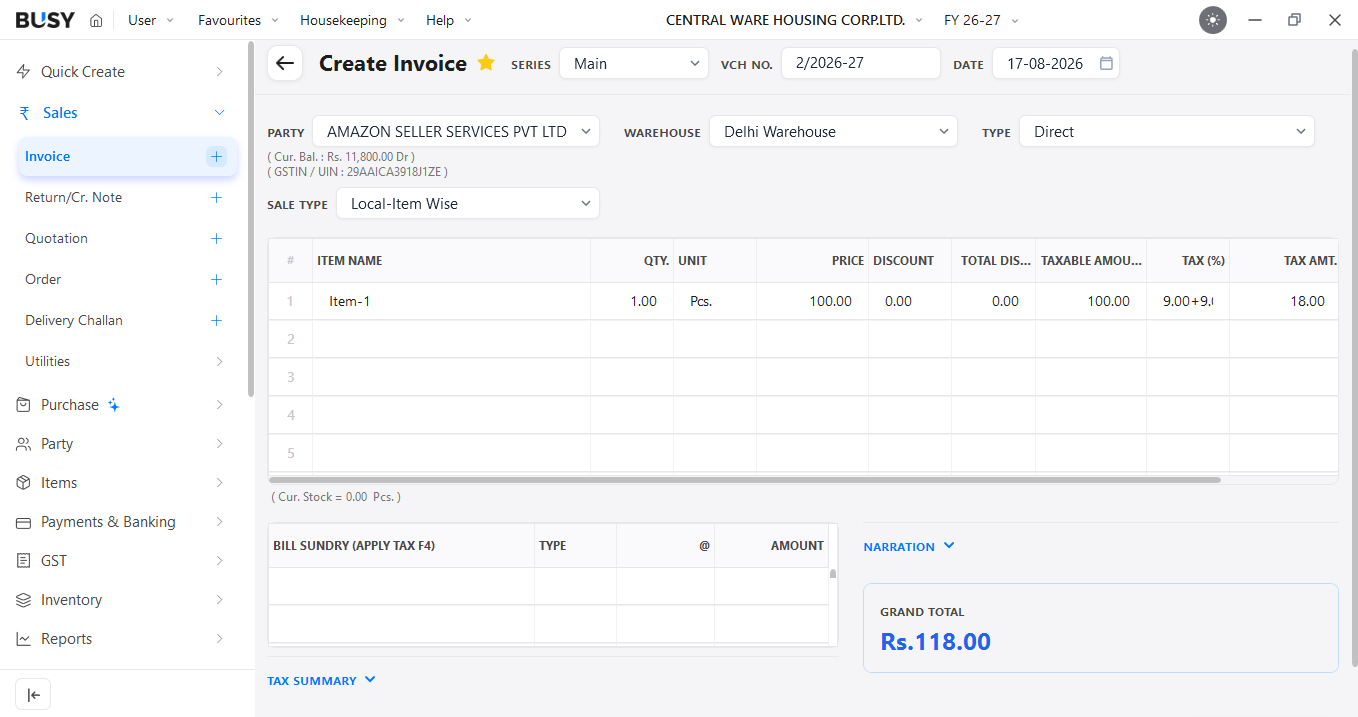
If Item-Level Warehouse is not enabled:
open the required voucher and enter the voucher details. Then select the required Warehouse and add voucher details. Add the item details and complete the voucher before clicking Save. The selected warehouse will apply to the items entered in that voucher.
Case 2: Warehouse at Item Level
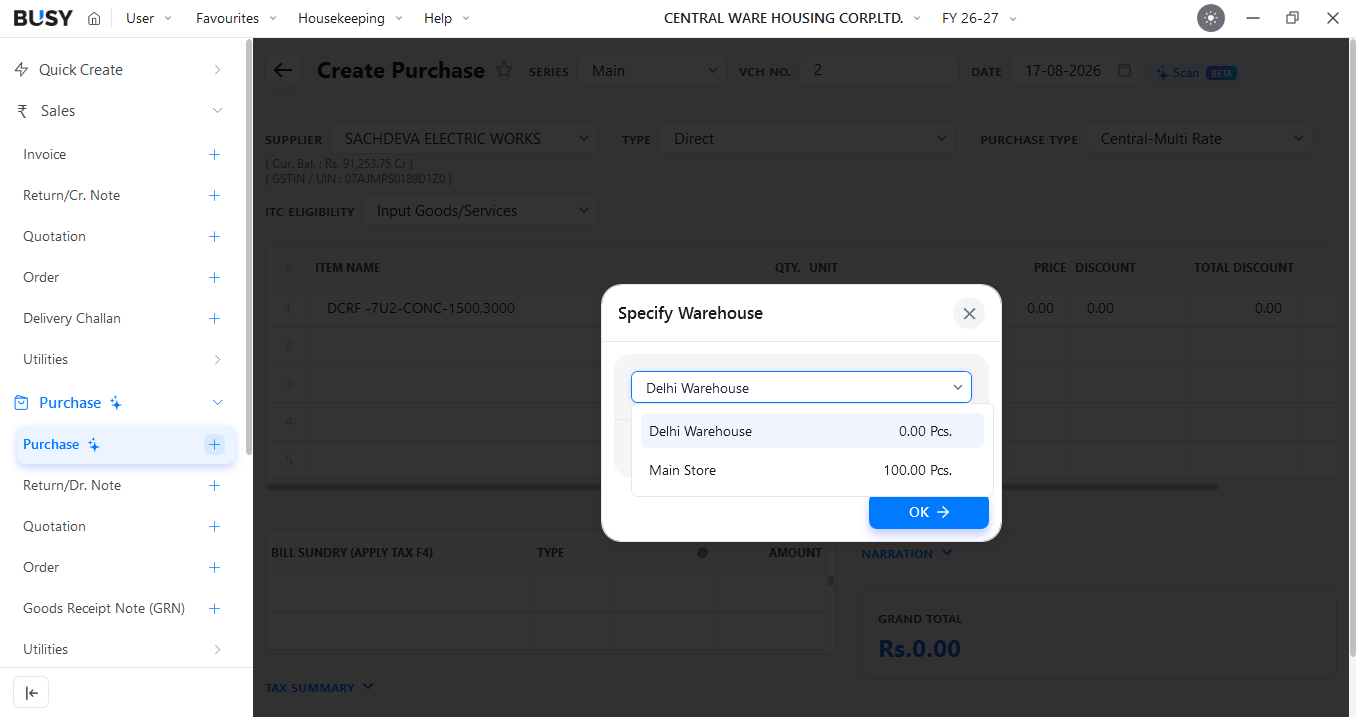
If different items in the same voucher need to be linked with different warehouses, enable the Item-Level Warehouse option.
Open the required voucher and enter the voucher details. Add an item and select the required warehouse for that item. Repeat this for each item as required. Finally, complete the voucher and click Save.
This option can also be used to manage smaller storage areas, such as individual racks, by creating them as separate warehouses.
Step 5: View Warehouse-Wise Stock
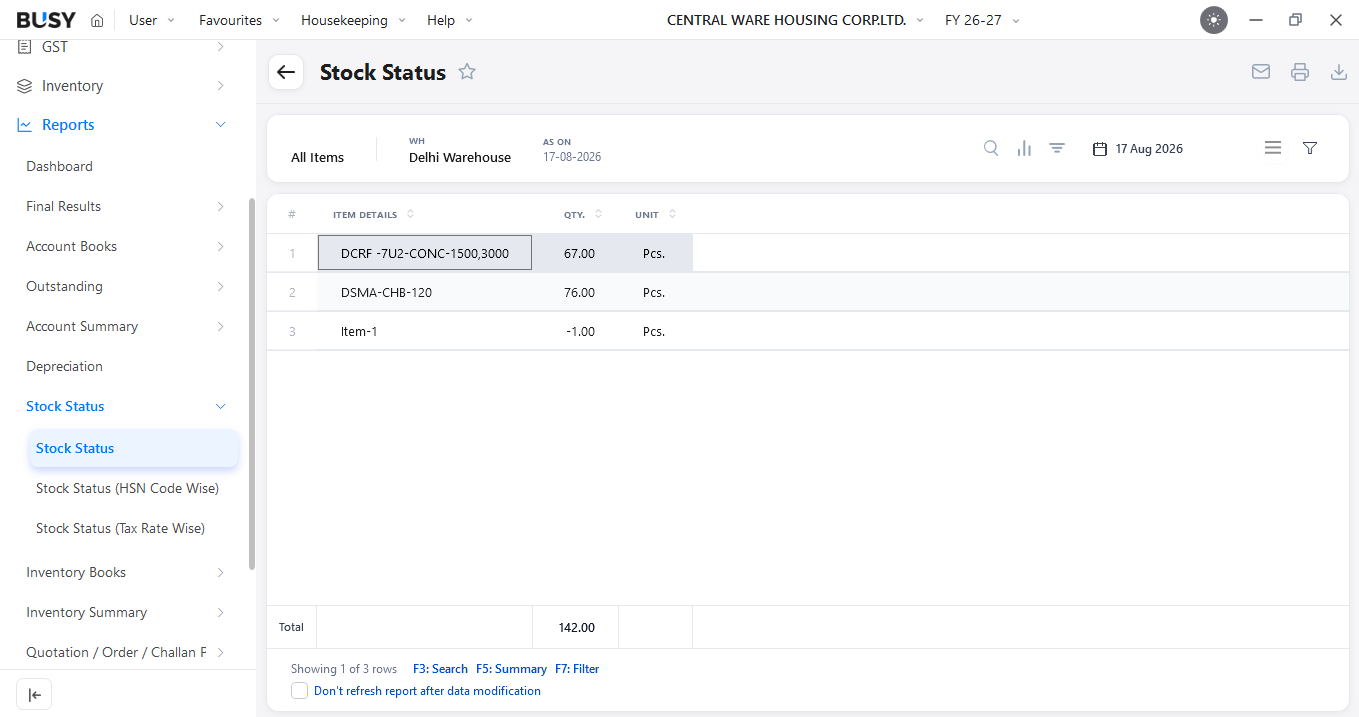
To check stock available across different locations, go to Reports > Stock Status > Stock Status Report and open Advanced Filters. Choose whether you want to view all warehouses, a specific warehouse, or a warehouse group.
Specify the required warehouse or group, then click Apply Filter. The Stock Status Report will display inventory based on the selected warehouse criteria.
What Our Customers Say
Real experiences from businesses across India.
Flexible Plans for Every Business
Paid plans start at just ₹5,000/year. Whatever your size, from small business to scaling enterprise, there's a BUSY plan built for you, so pick what you need today and upgrade anytime.
Enjoy More Accounting Benefits With BUSY
Free Mobile App for access on the go
Complete control over the User Activity Log
Auto-Backup through Google Drive