Serial Number Inventory Management Software
Businesses dealing in electronics, appliances, machinery, mobile phones and other individually identifiable products often need to track each item by its unique serial number rather than just counting quantities. This makes it easier to identify specific units, especially when warranty or after-sales information needs to be checked.
Track Units. Manage Warranties.
Identify every item with serial numbers and keep complete control over your inventory.
Trusted by Businesses, Rated by Experts


How BUSY Makes Serial Number Tracking Easier
Track Individual Items with Unique Serial Numbers
Generate, Enter & Scan Serial Numbers Easily
Maintain Item Details, Warranty & Installation Records
Access Serial Number-Wise Stock Reports Instantly
How to Use Serial Number Inventory in BUSY
Step 1: Enable Serial Number Tracking
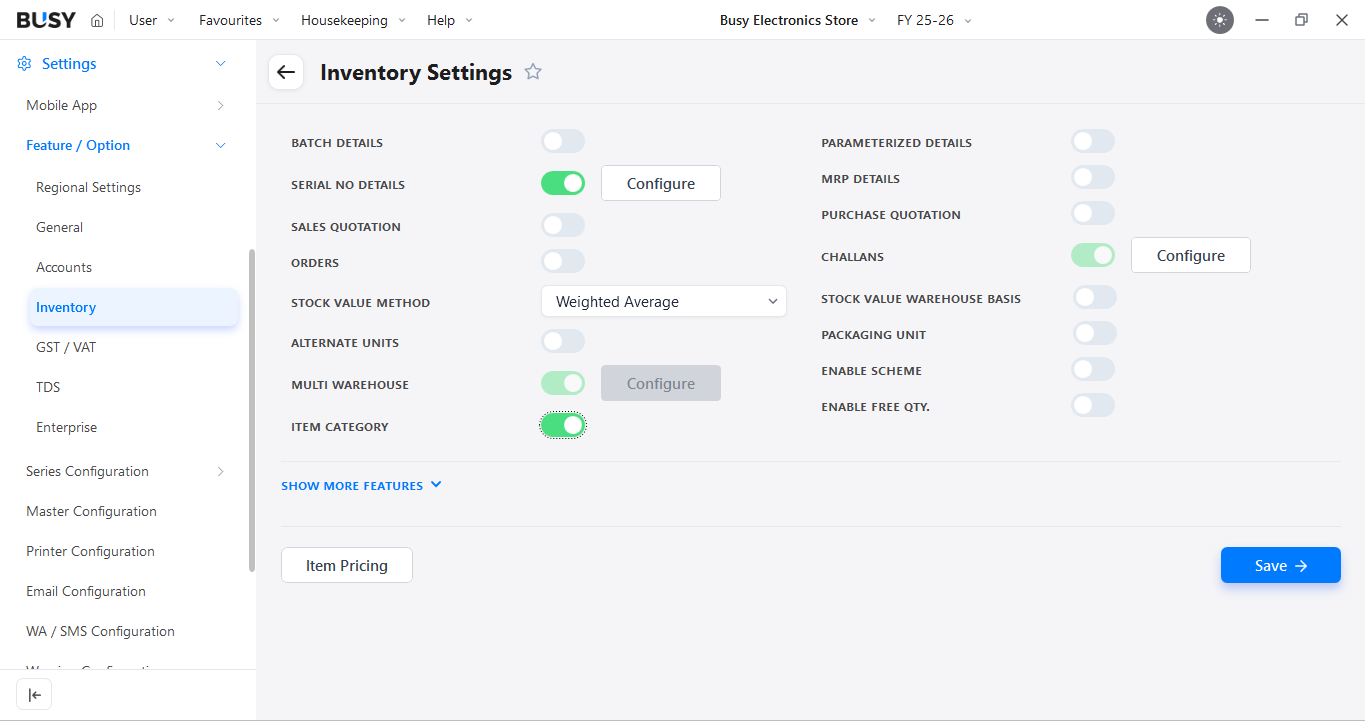
Go to Settings > Features/Options > Inventory and enable Serial No..
Step 2: Configure Serial Number Details
.png)
In the configuration window, enable the options required for your business, such as Maintain Sales Price or Maintain MRP.
Step 3: Enable Item Serial Number Description (Optional)
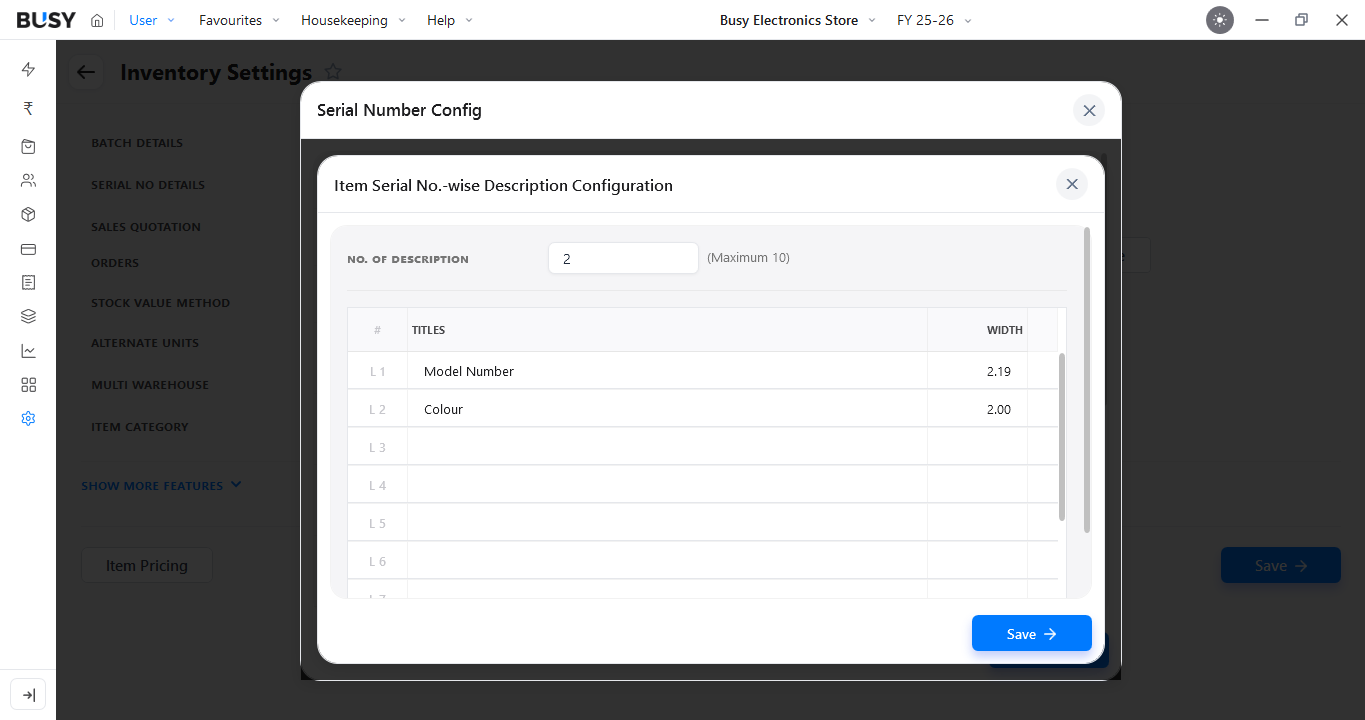
If you want to store additional information with each serial number, enable Maintain Item Serial Number Description. You can configure up to 10 descriptions for each serial number. Click Save after completing the settings.
Step 4: Enable Serial Number Tracking for an Item
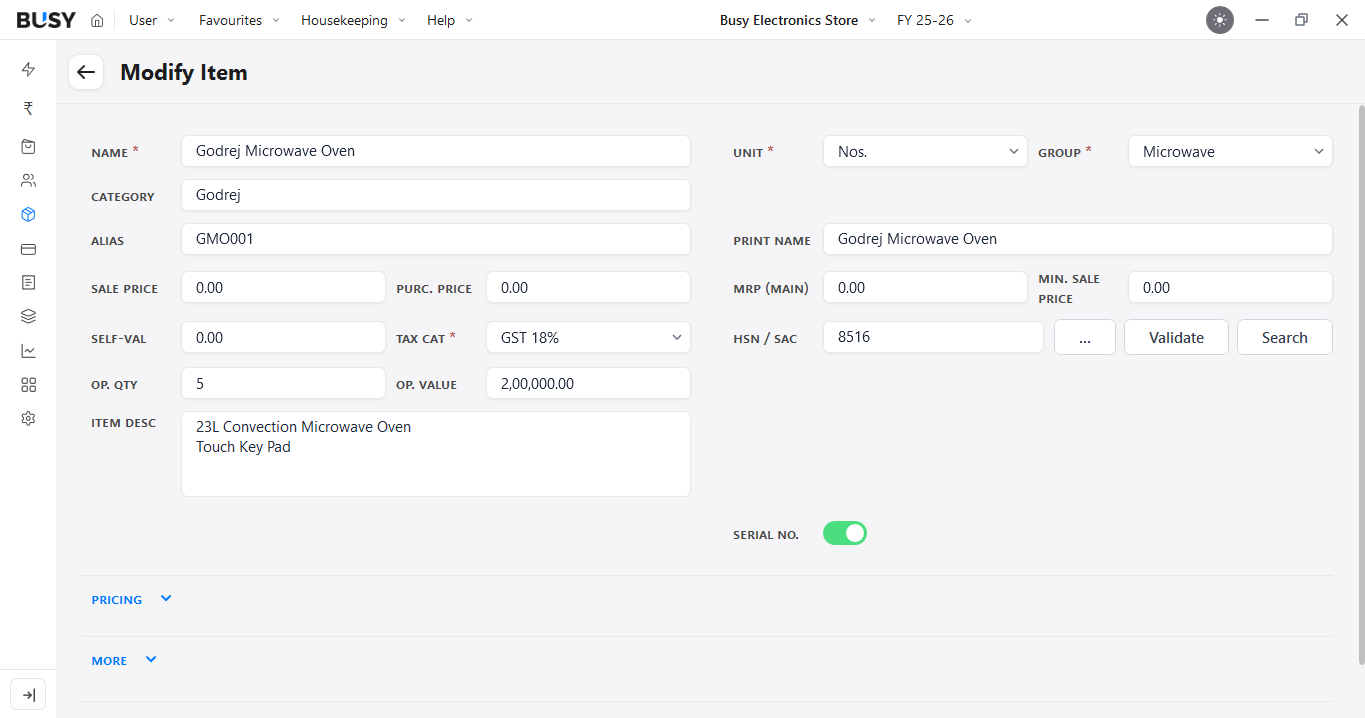
Create a new item and enter the basic details. Enable Serial No. if serial number tracking applies to the item. Enter the opening stock, if available, and click Save.
Step 5: Configure Numbering Type and Warranty Details
.png)
The Item - Serial Numbering Type & Warranty Details window will appear. Choose from Automatic or Manual numbering. For automatic numbering, configure the required serial number structure.
If required, enable tracking for Purchase Warranty, Sale Warranty, or Installation Warranty and click Ok.
Step 6: Enter Serial Numbers
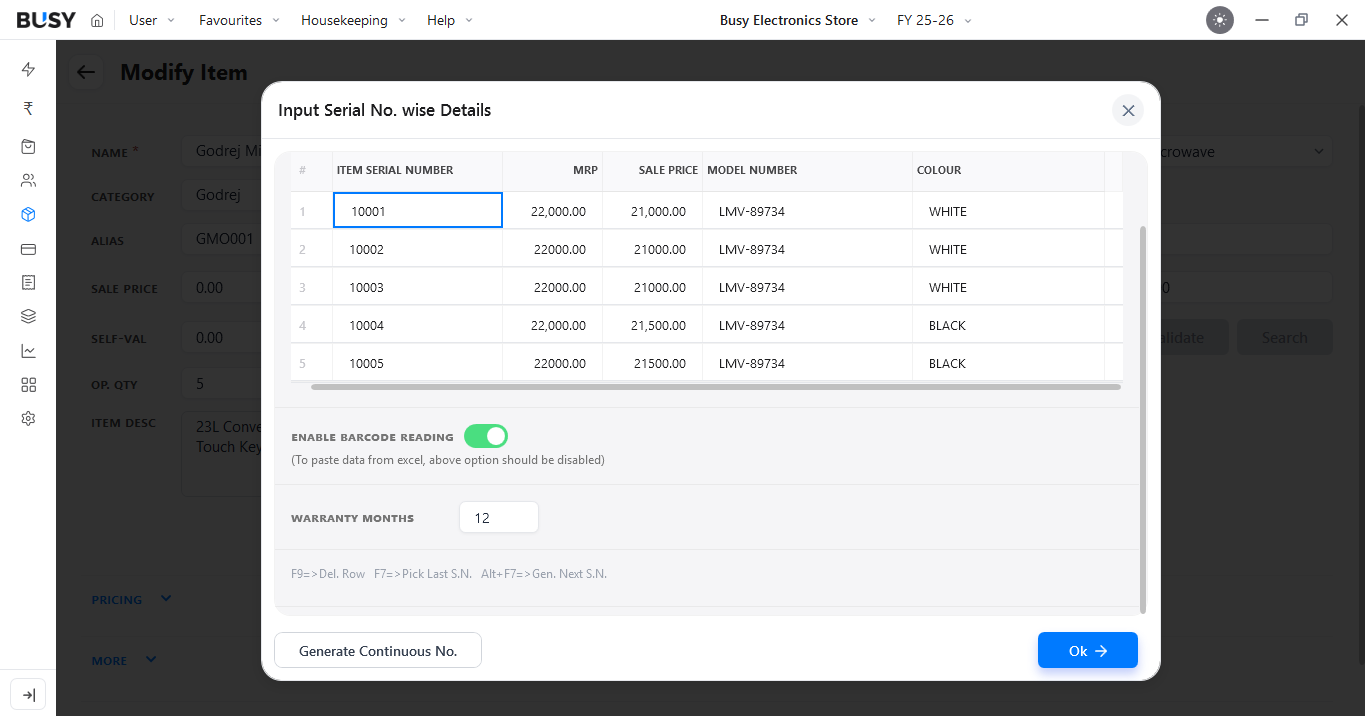
For manual numbering, enter the required serial numbers. If barcode reading is enabled, you can also scan serial numbers while entering details. Click Save after entering the details.
Step 7: Record Serial Numbers in Purchase or Sales Vouchers
For Purchase:
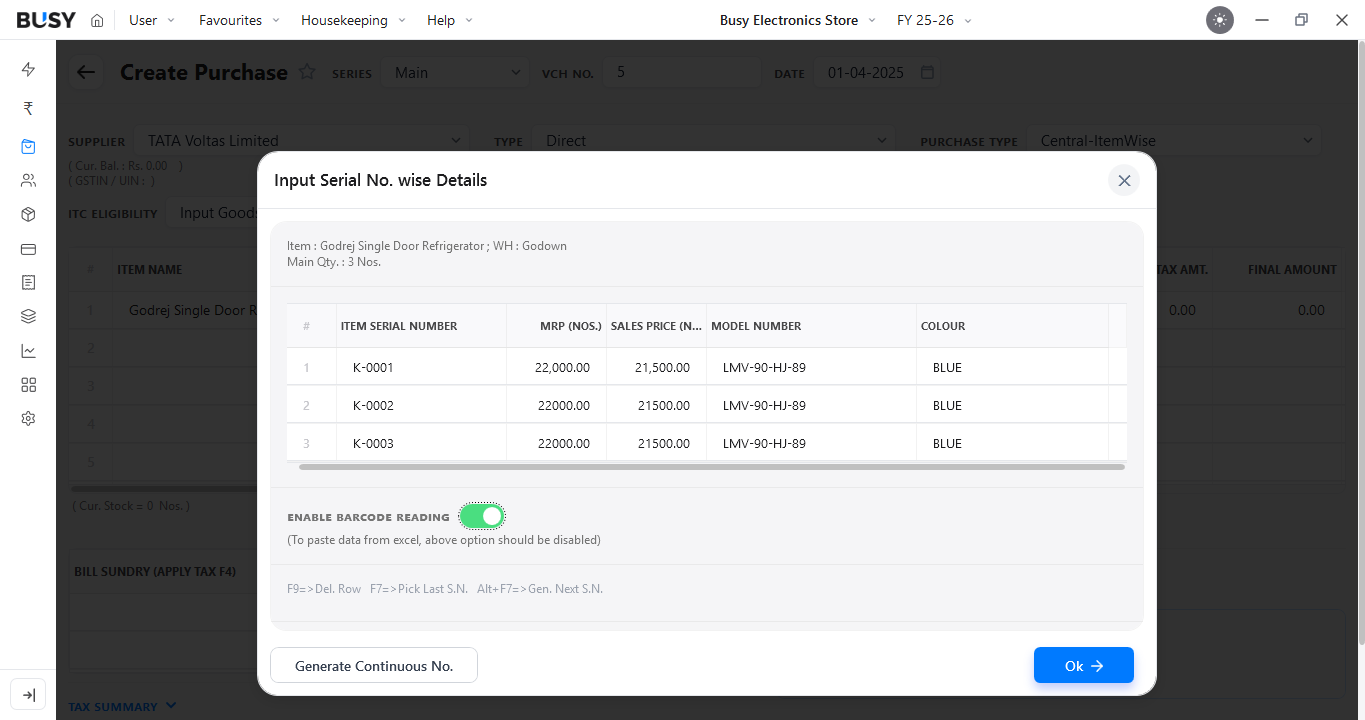
Create a Purchase Voucher, enter the required details, select the item, and specify the quantity. In the Serial Number window, enter or select the serial numbers for the item. You can also use shortcut keys such as F7 to pick the last serial number and Alt + F7 to generate the next serial number.
If barcode reading is enabled, you can scan the serial number directly. Complete the remaining voucher details and click Save.
For Sales:
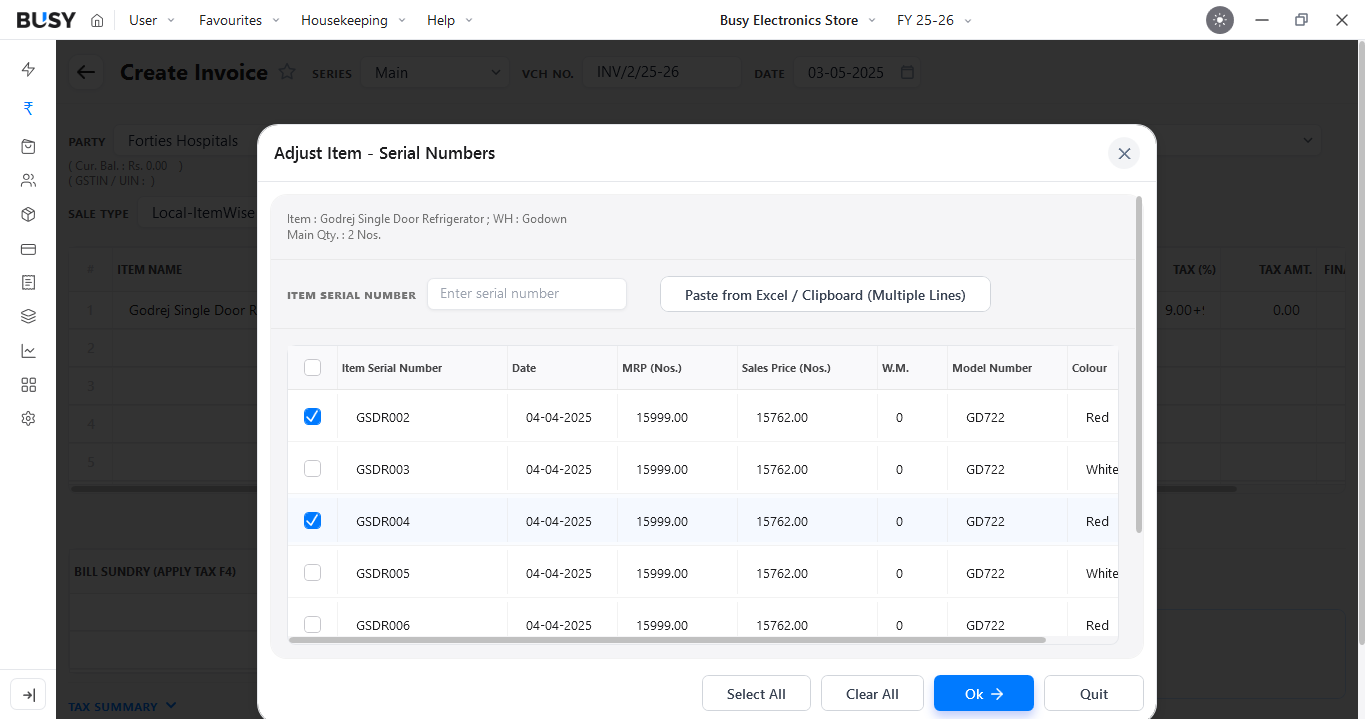
Create a Sales Voucher, enter the required details, and add the item with the required quantity.Then select the serial number to be issued, or scan it where barcode reading is enabled. Complete the remaining details and click Save.
When the Sales Invoice is printed, the applicable serial number details will also be displayed.
Step 8: View Serial Number Stock Reports
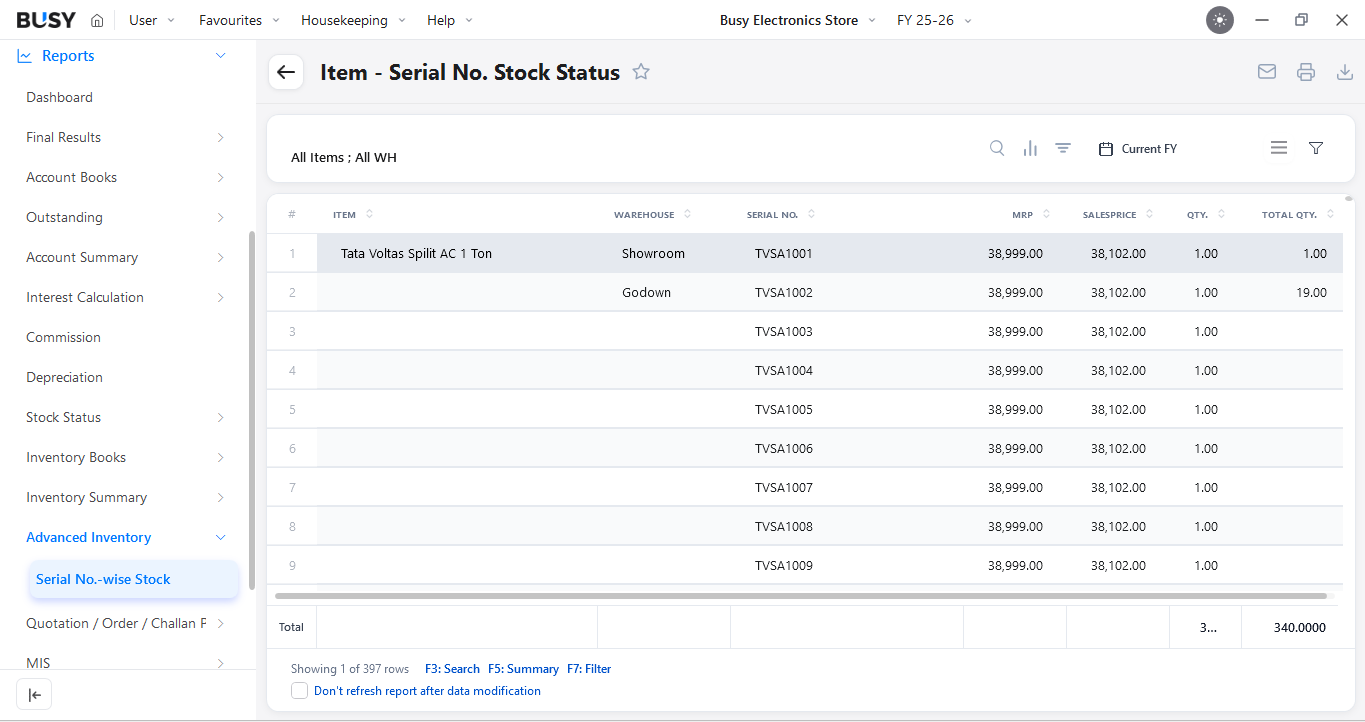
Go to Reports > Advanced Inventory > Serial No.-wise Stock to check available serial numbers for different items. Use Advanced Filters, Search, or Summary options to narrow the report as required.
What Our Customers Say
Real experiences from businesses across India.
Flexible Plans for Every Business
Paid plans start at just ₹5,000/year. Whatever your size, from small business to scaling enterprise, there's a BUSY plan built for you, so pick what you need today and upgrade anytime.
Enjoy More Accounting Benefits With BUSY
Free Mobile App for access on the go
Complete control over the User Activity Log
Auto-Backup through Google Drive